4 - Shooting
4 minutes read
Scene
This takes place near the B objective. The engineer shoots at an enemy assault soldier, but since his weapon sucks, the enemy headshots him.
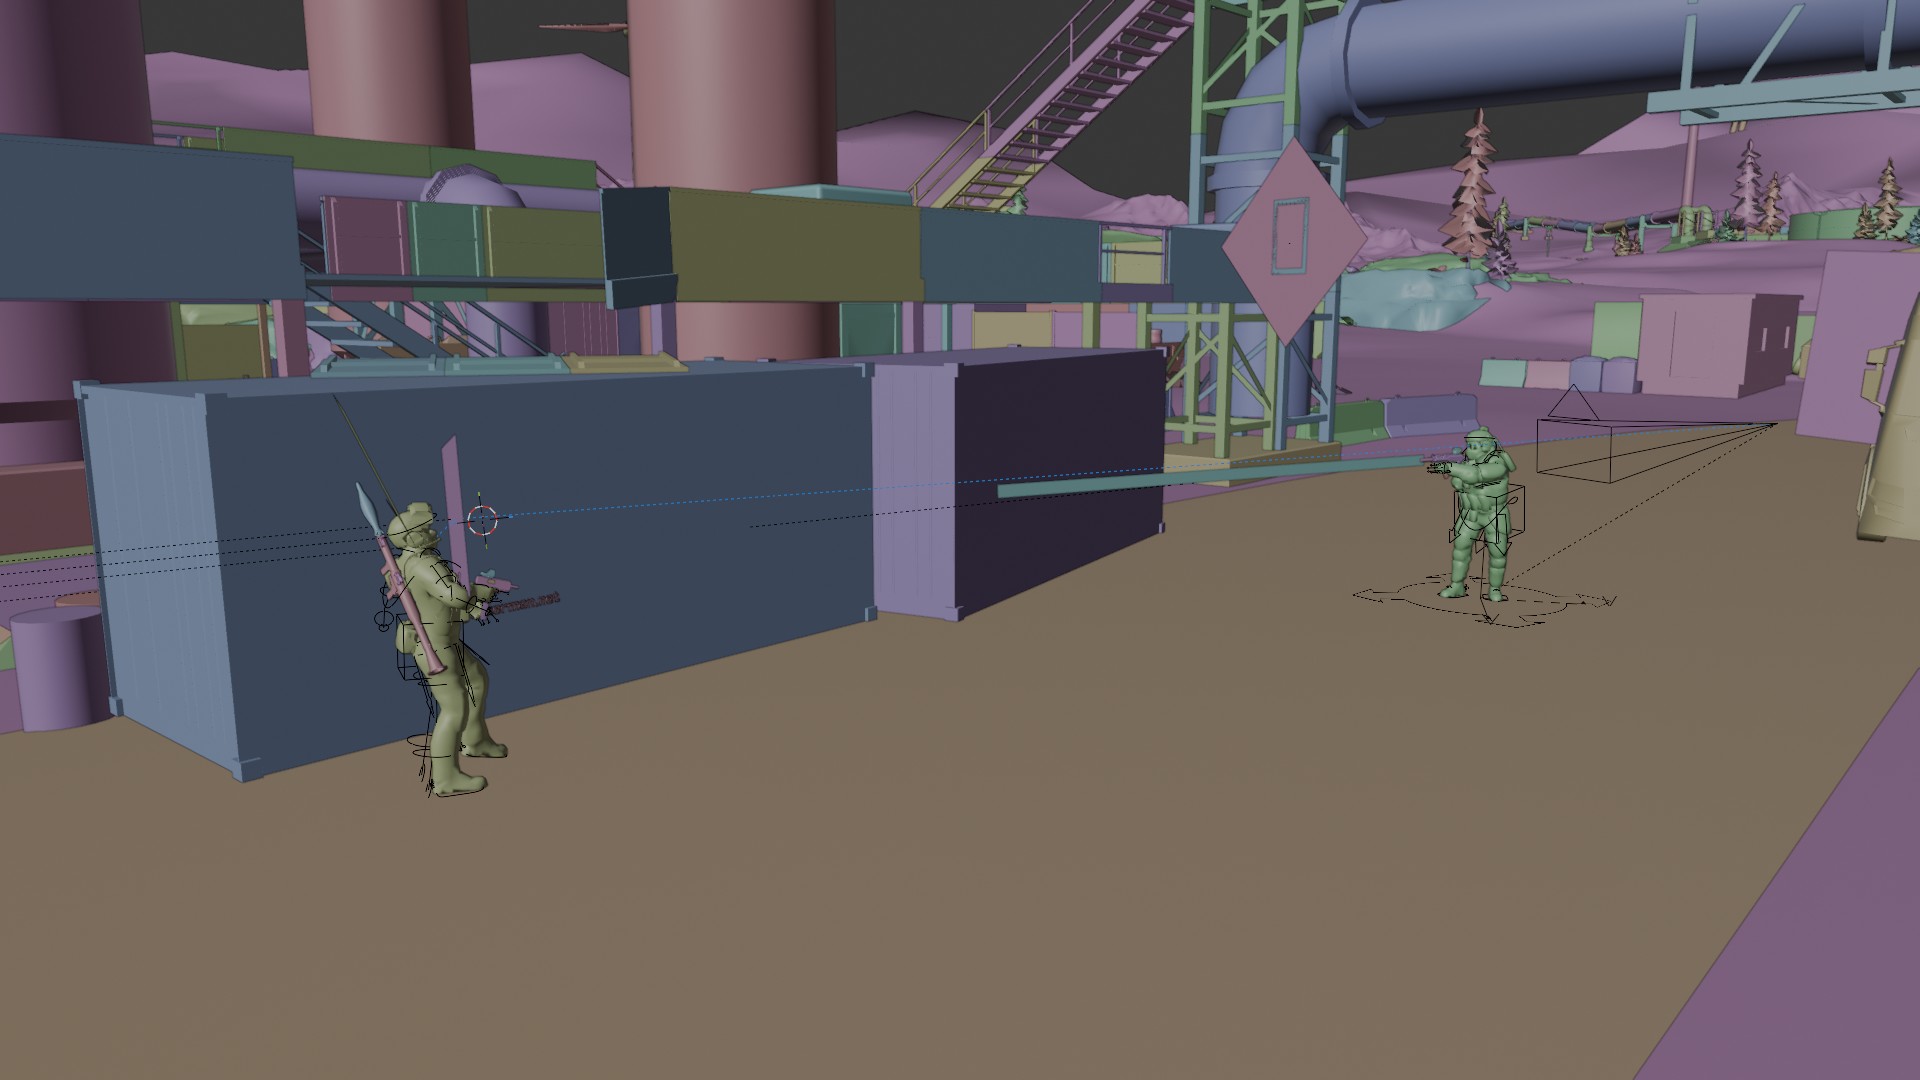
I cut this scene into several Blender files so that it would be easier to make the stylized scenes. I have nothing particular to say about the other shots, which use the same techniques as the previous scenes, so let’s skip to the parts with the Jojo-inspired effects.
Effects
Onomatopeia
I wanted to use the famous onomatopeia from Jojo for some scenes. For this, I used image planes or text objects, and made them slide along a curve.
For this, I used a geometry node setup proposed by Robin Betts on Blender stack exchange :
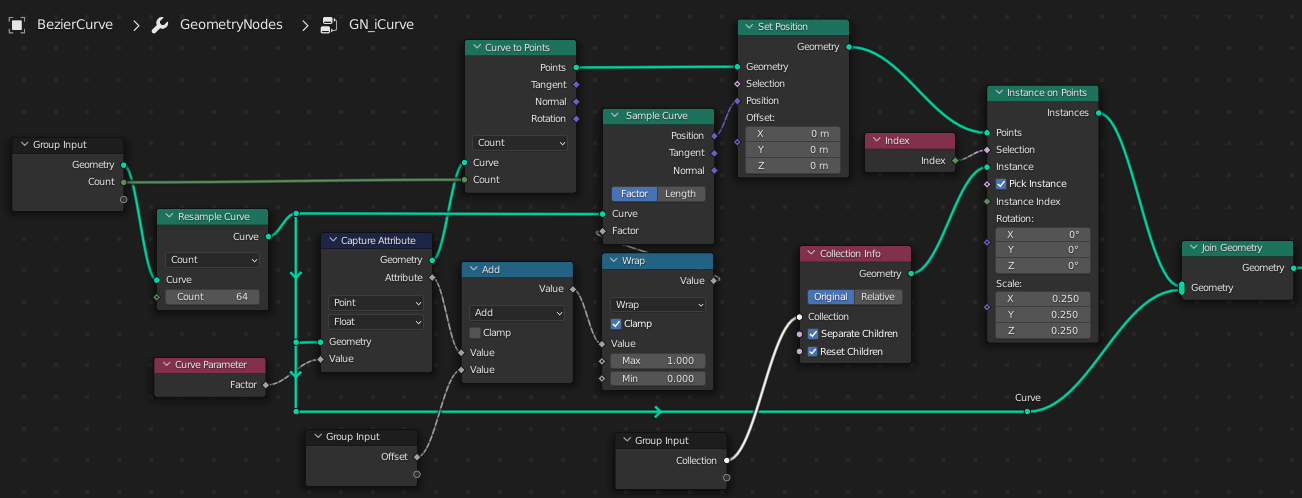
I added a Randomize transforms node to be able to animate the scale of the objects and give them a random scale and position change with a noise modifier on their animation curves. The sprites follow a curve circle which is bigger than the camera FOV, allowing to create a curved path easily.
The scene is then rendered on a transparent background and is added in video editing.
Character animation
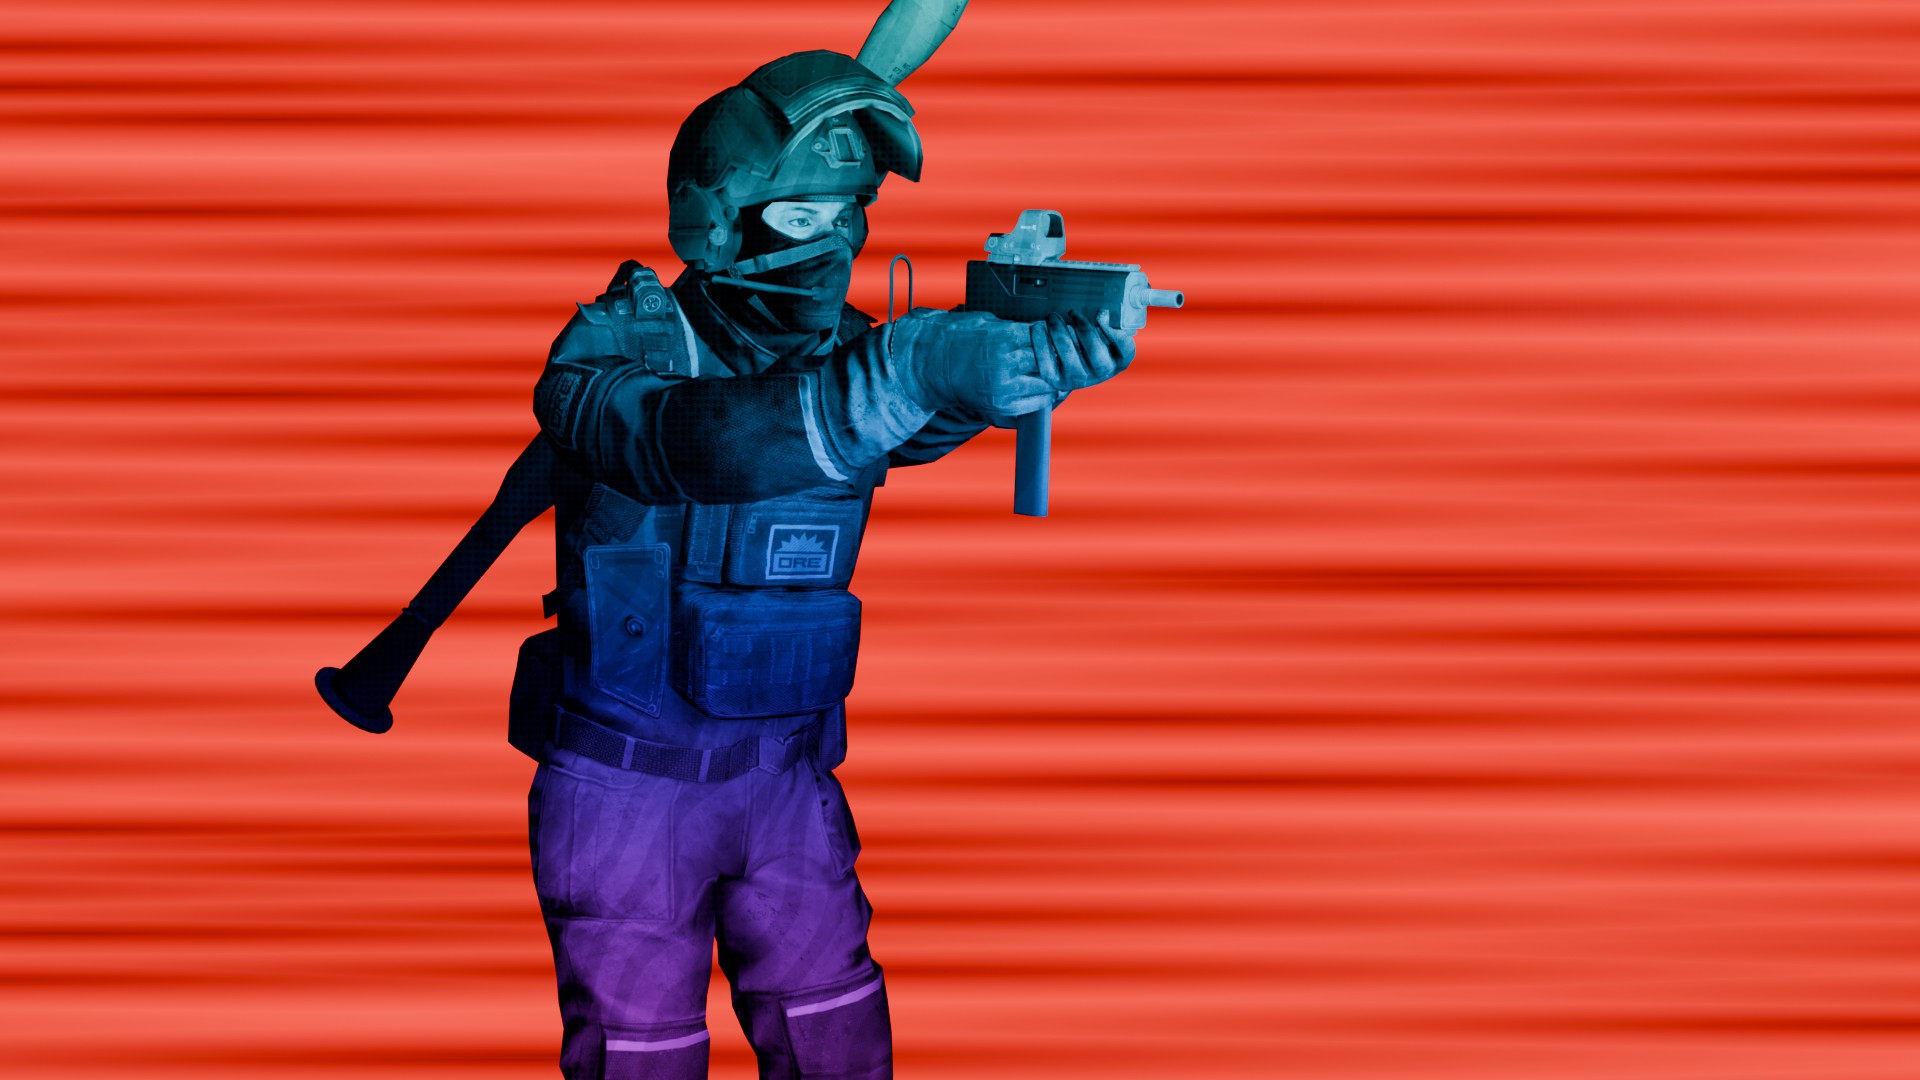
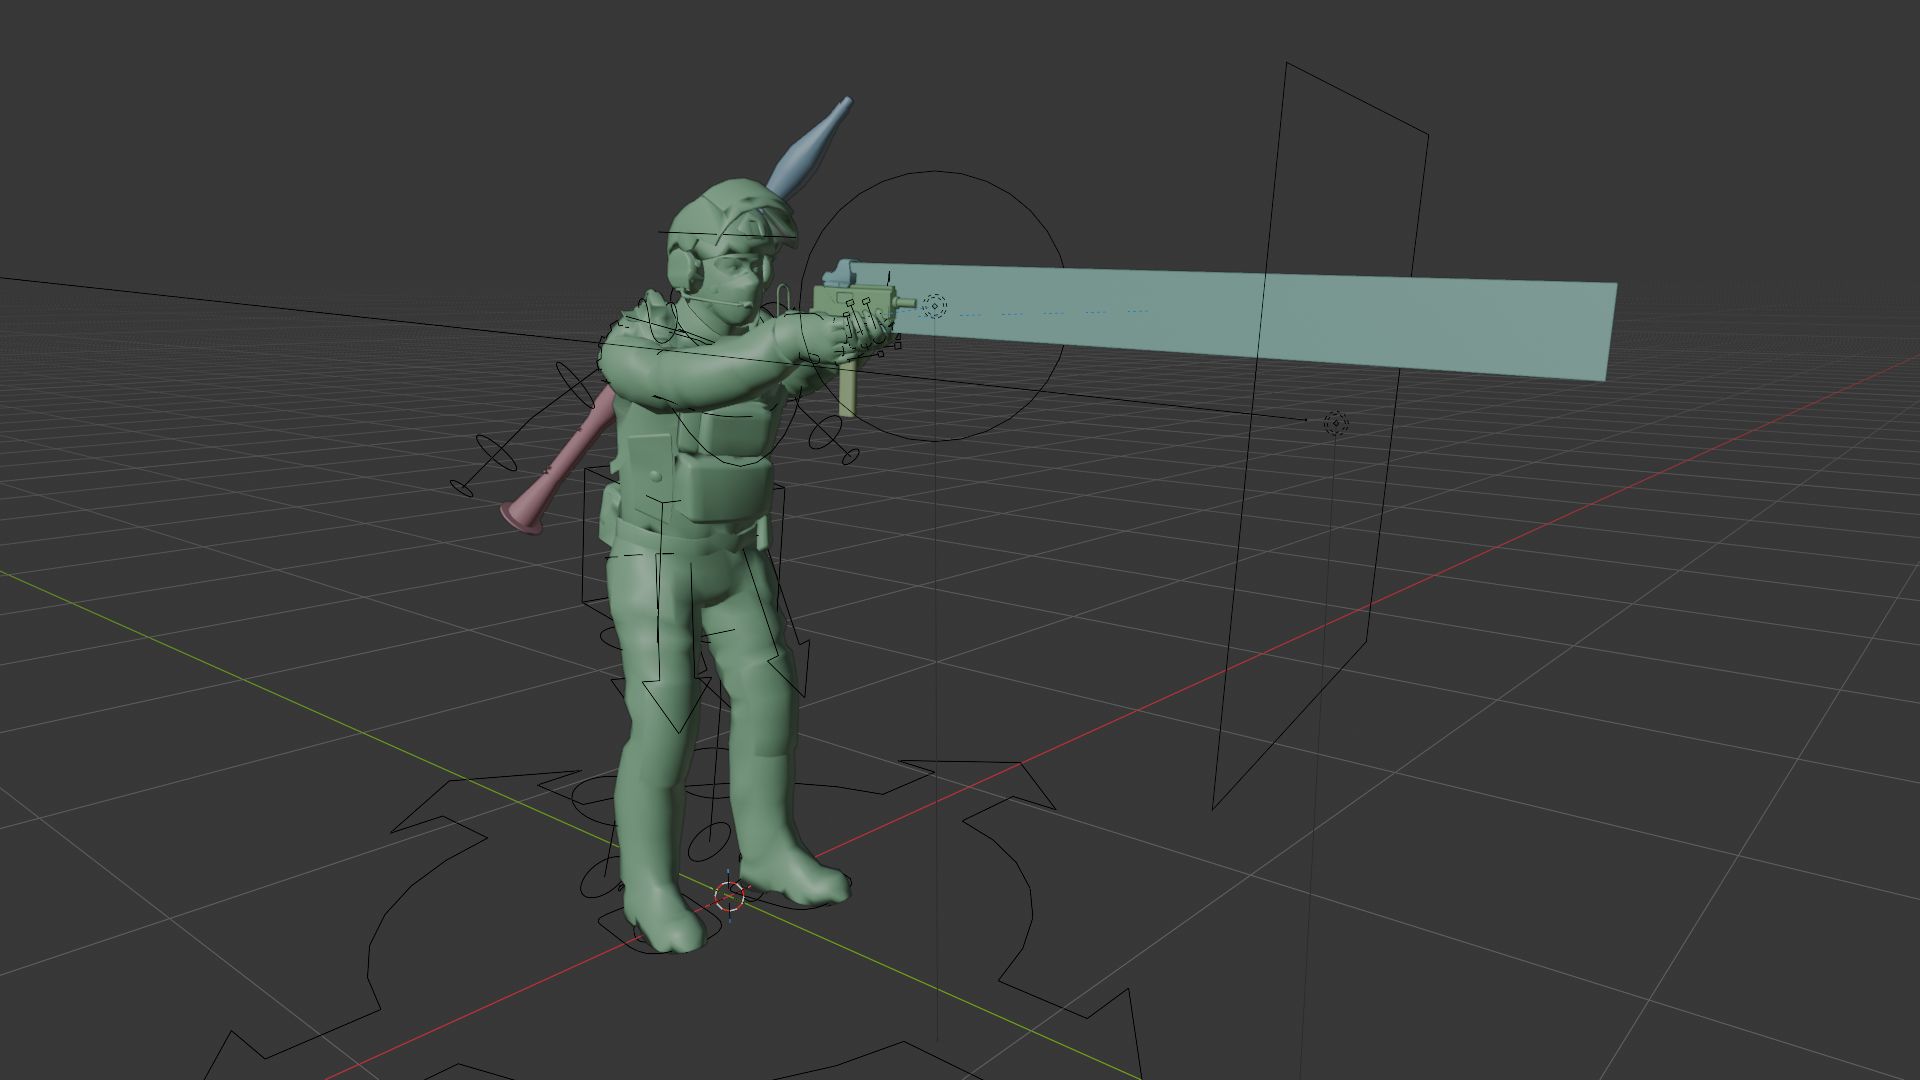
The character is placed on a transparent background and is lit by a main Area light, and a secondary Point light when the weapon is fired.
The weapon recoil is animated using a Noise modifier to make it look more random.
Background
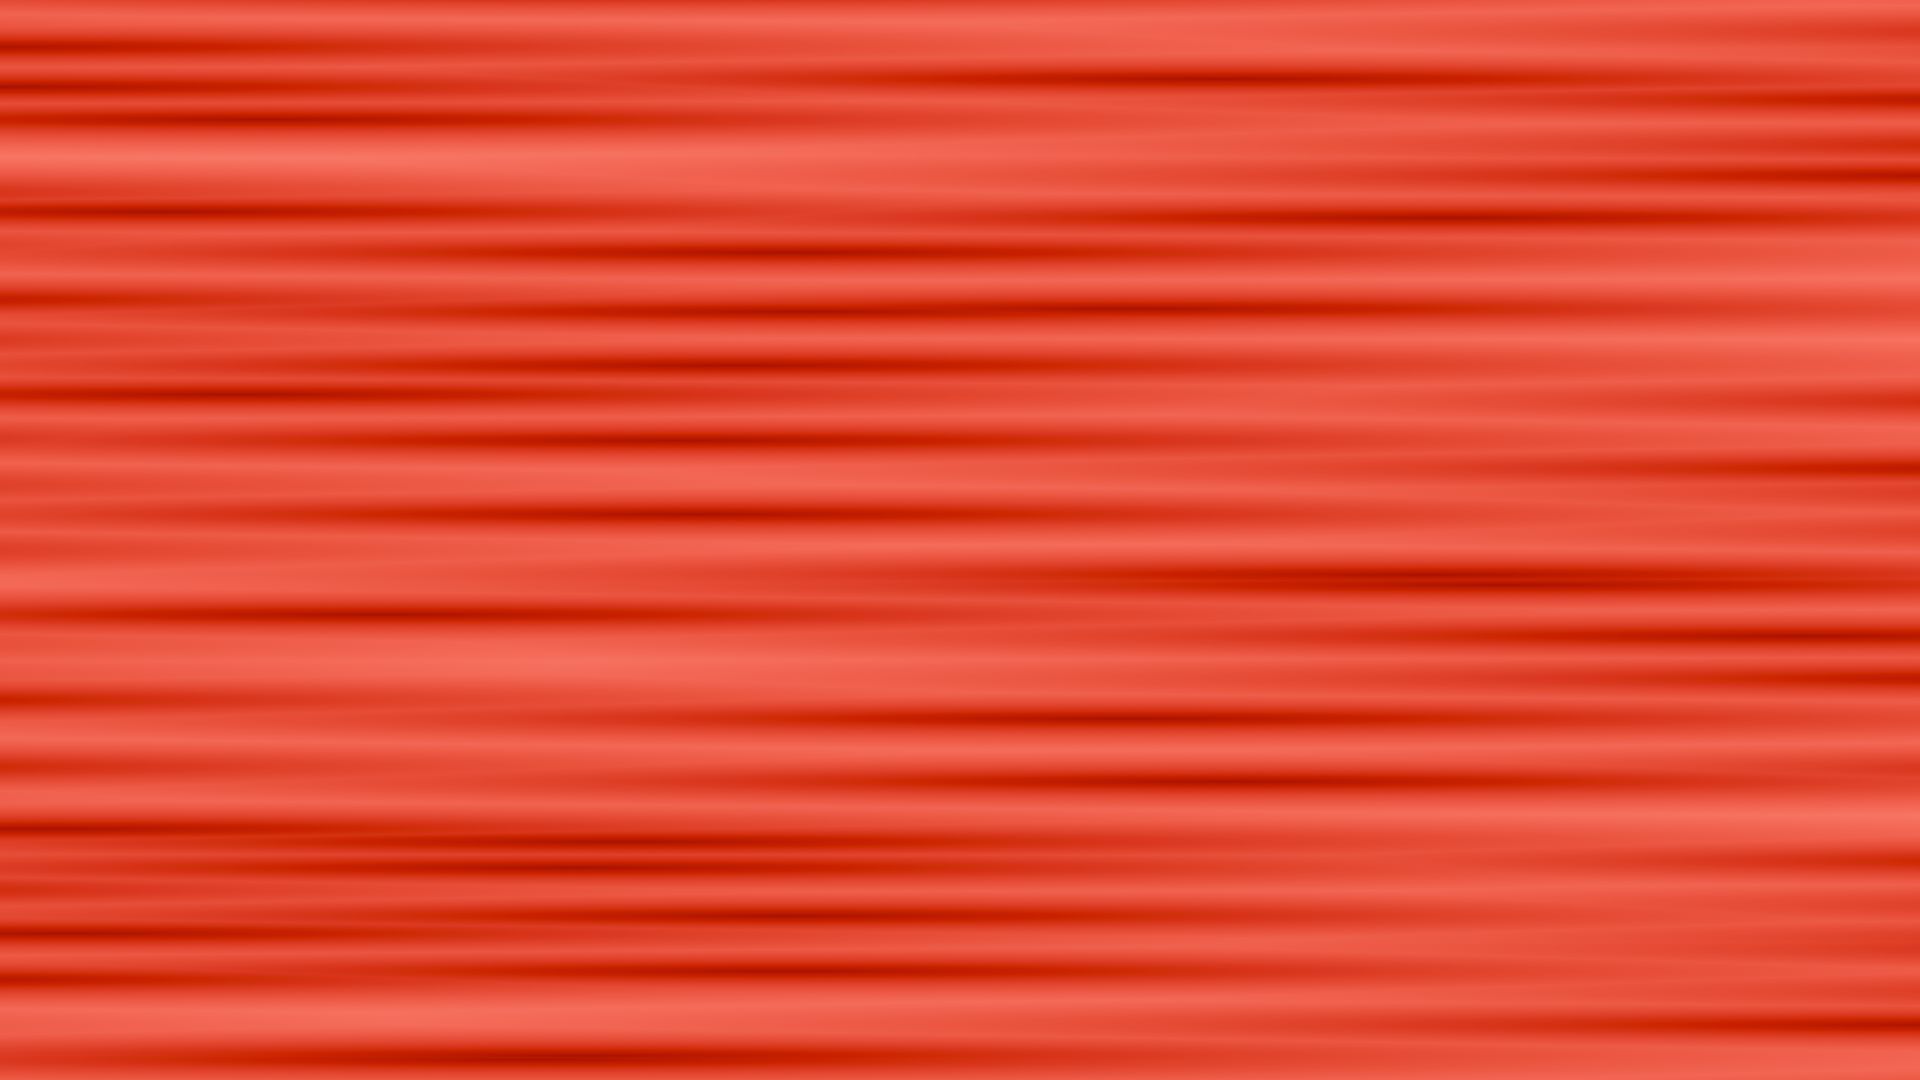
The background is made by scaling horizontally a Voronoi texture. The difficulty is that there are no dedicated inputs to scale or move the texture, so I had to use Vector math nodes on the image coordinates to get the desired effect.
The image is in grayscale, so I used a Sepia node to add a red color.
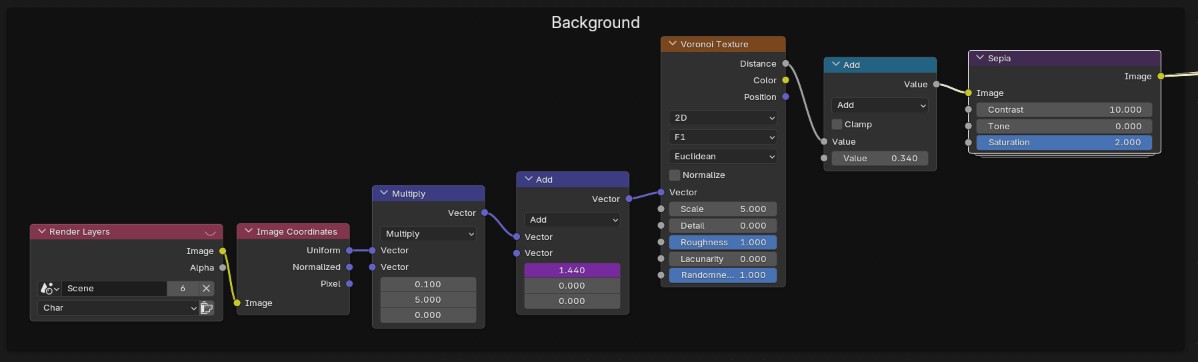
To animate it, I used a frame-based driver in the Vector Add node to move the texture coordinate on the X axis.
Shading
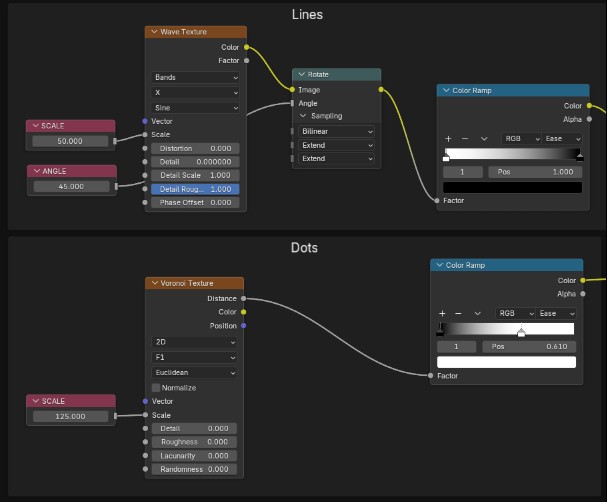
I used a pattern of dots and lines for the shading that are similar to techniques used in manga. For the lines, I used a Wave texture, and for the dots, a Voronoi texture with Randomness = 0.
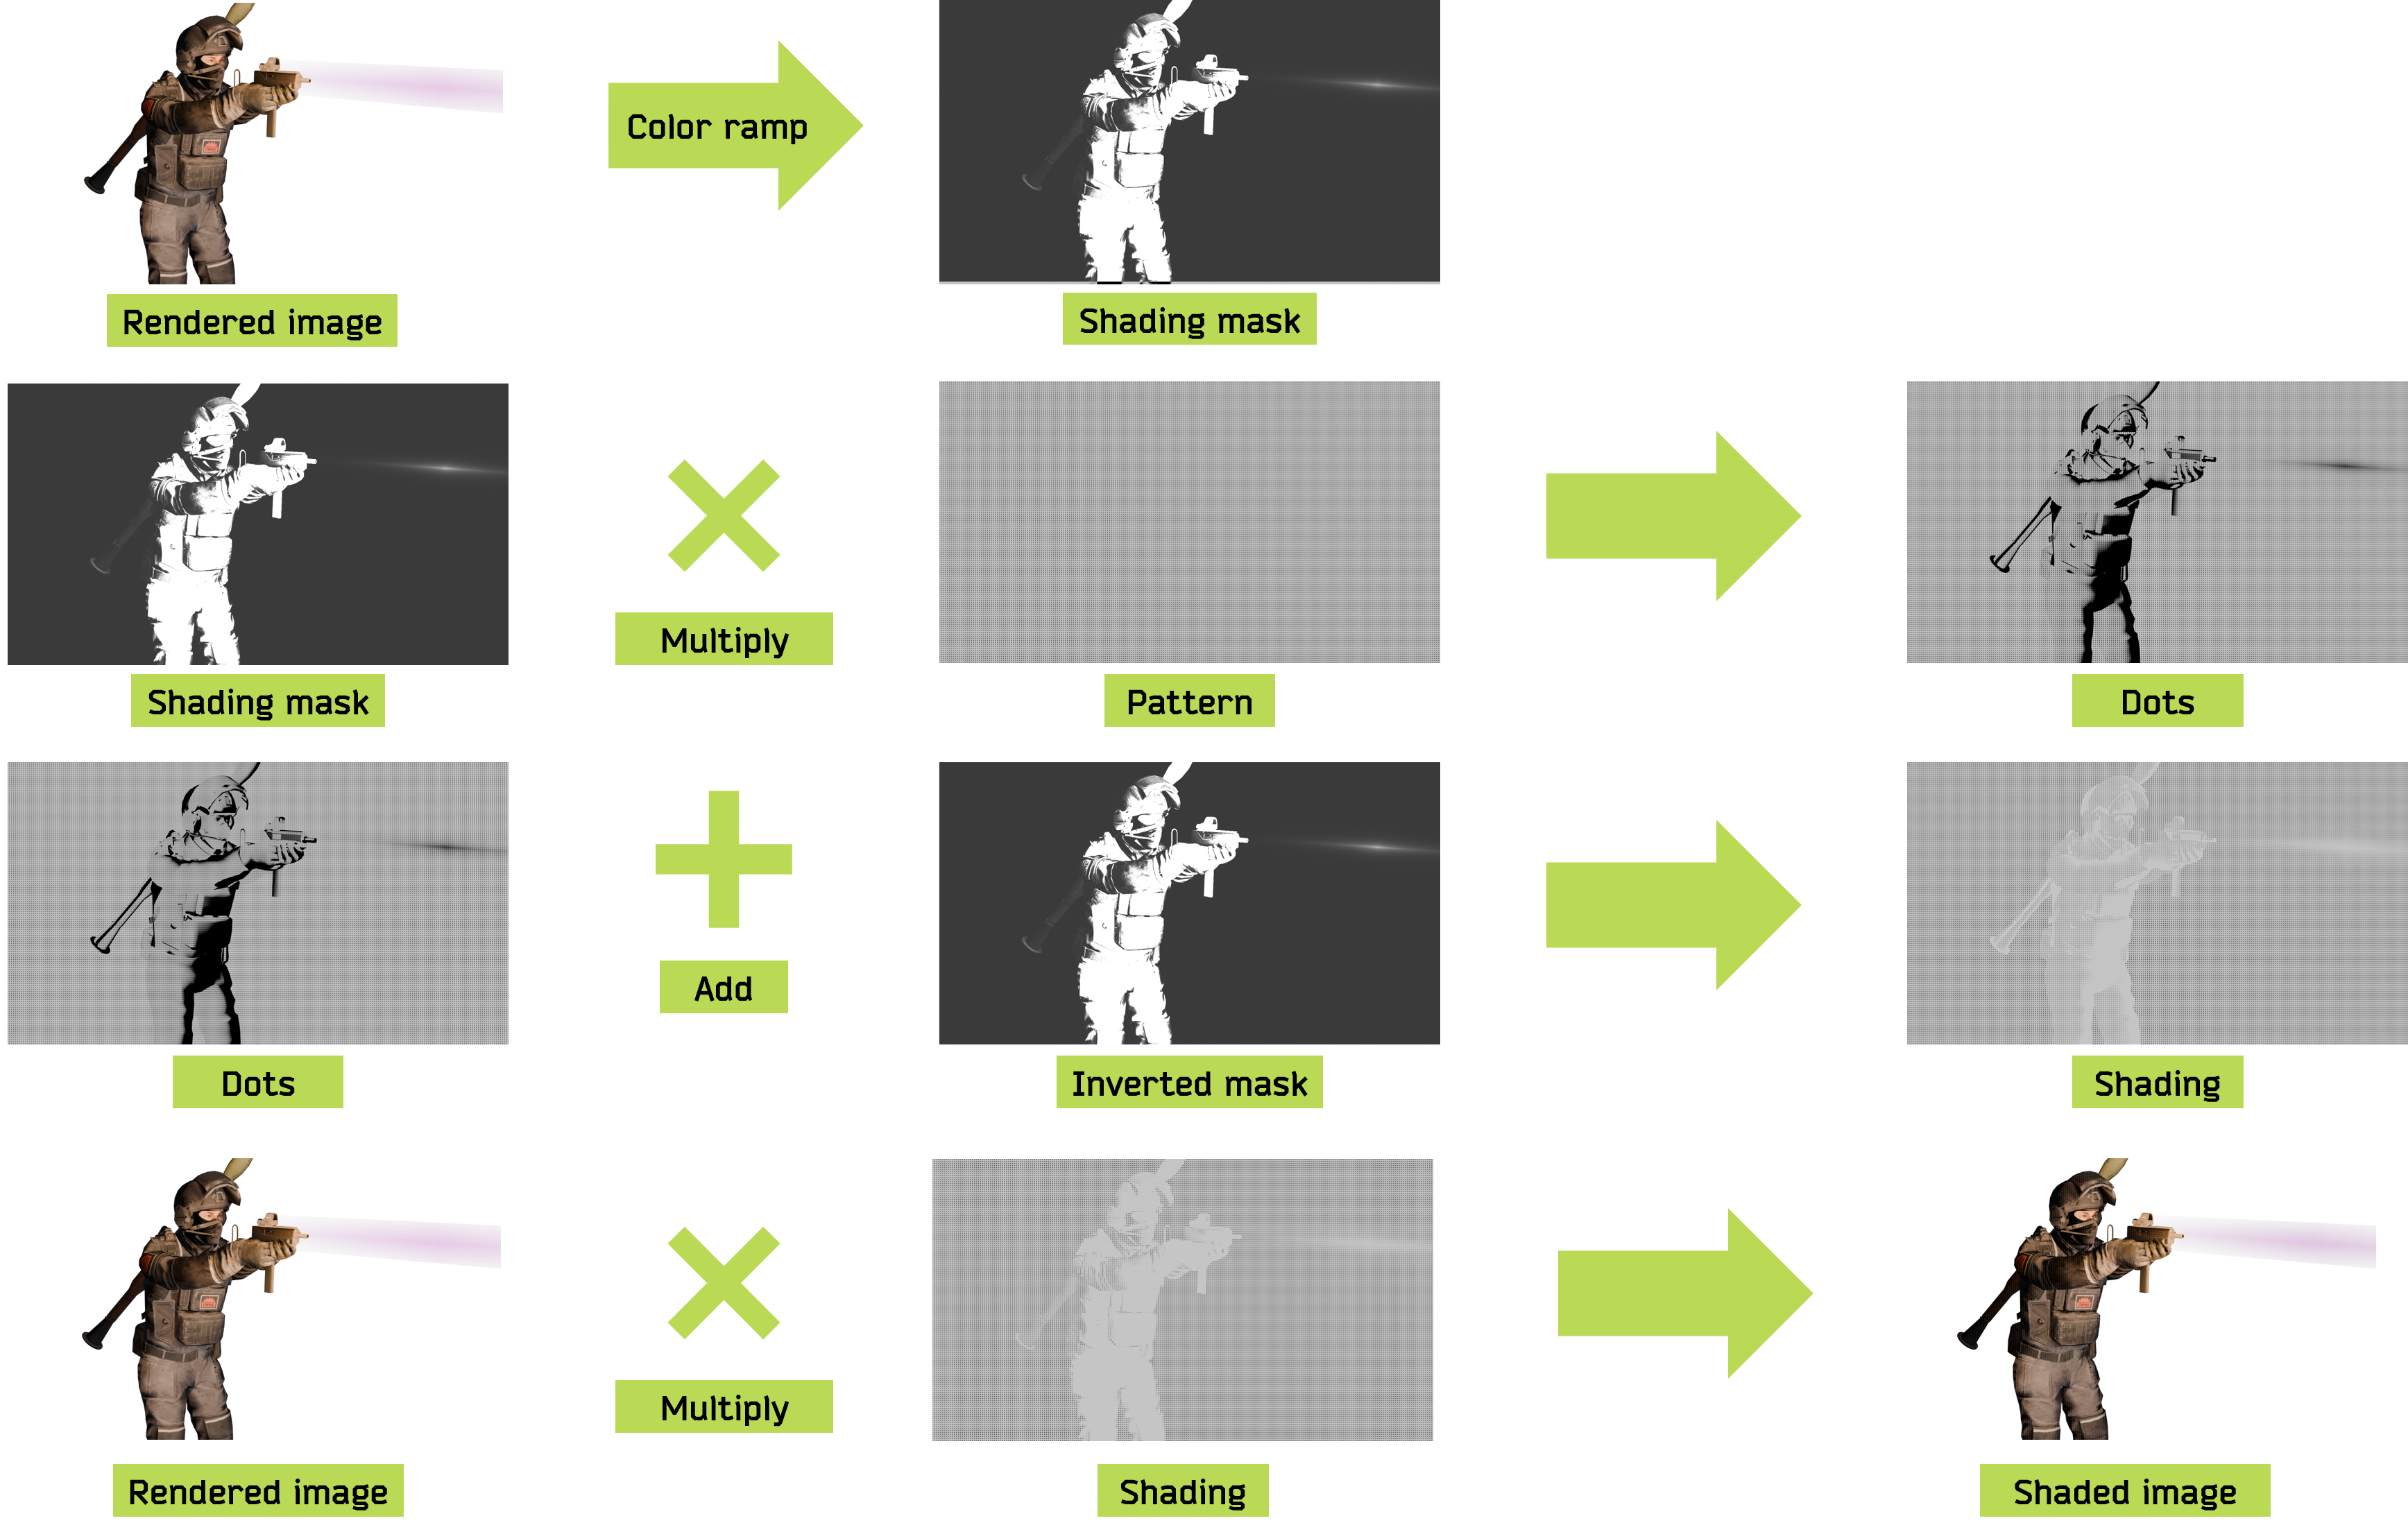
Then one of these textures will be selectively applied on the dark areas of the character. To do this, I created a mask based on the original image, which is multiplied with the pattern image (click to enlarge) :
Color effects
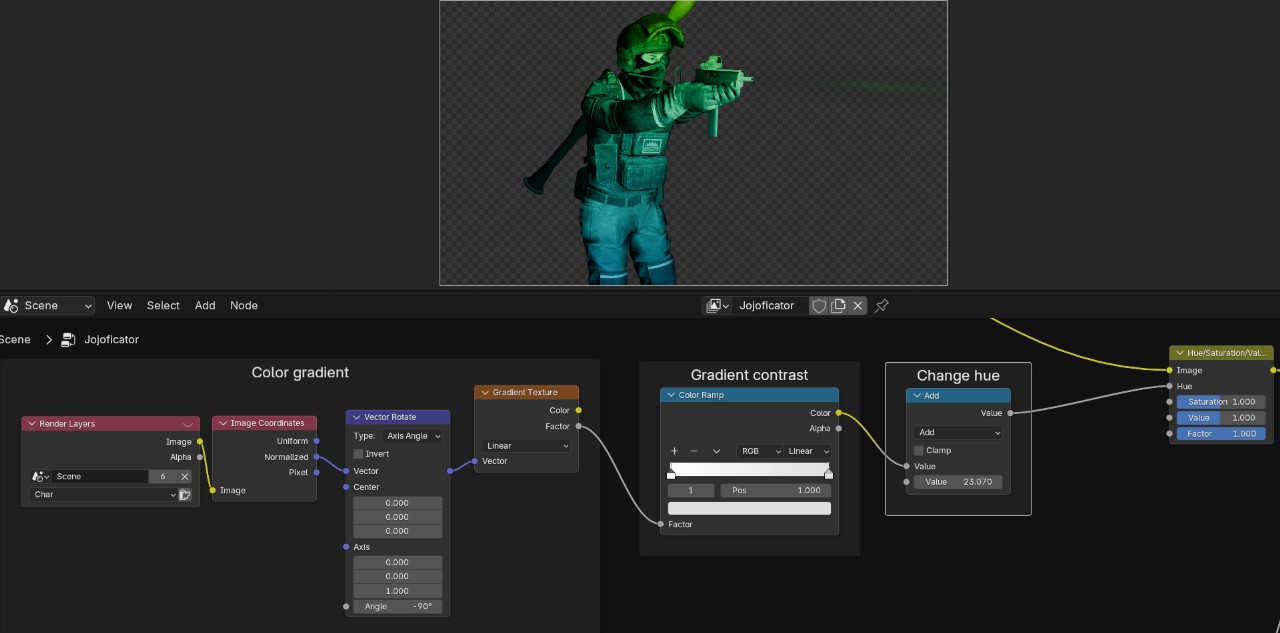
The color effects follow a similar process, except this time I used either a Gradient texture or a distorted Wave texture to create new patterns, and use the Hue/Saturation/Value node to apply them to the previous image.
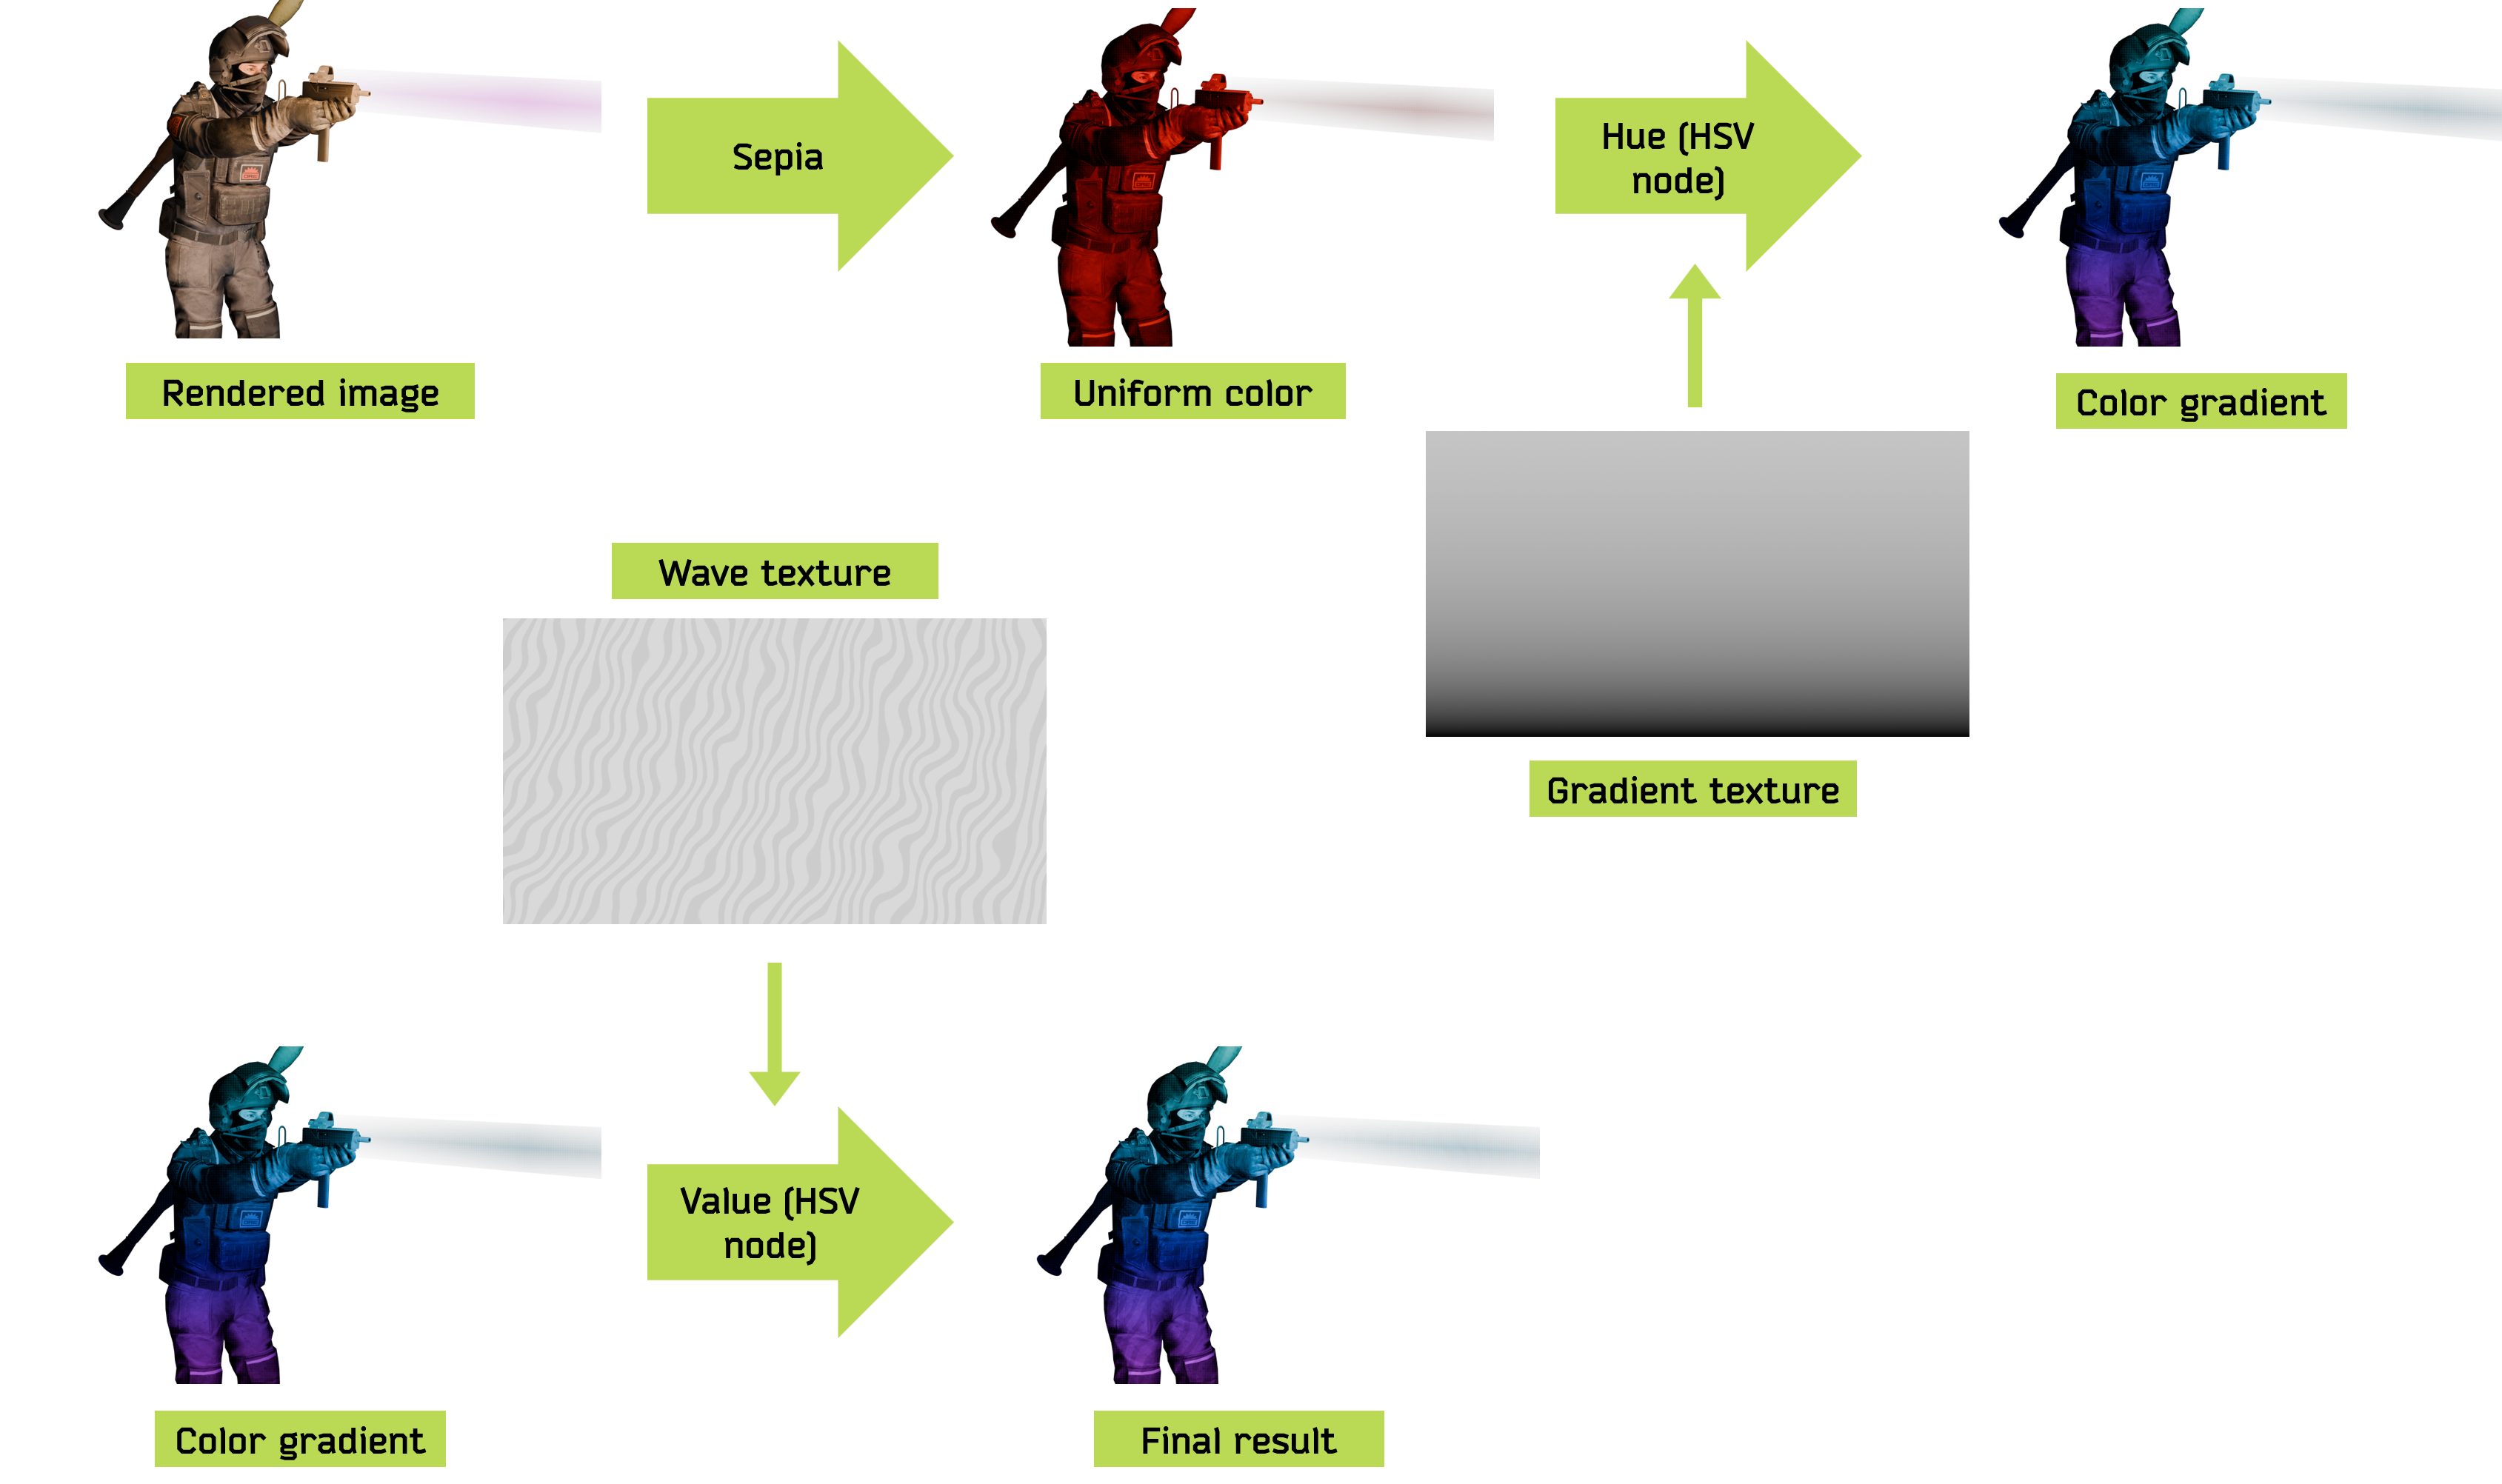
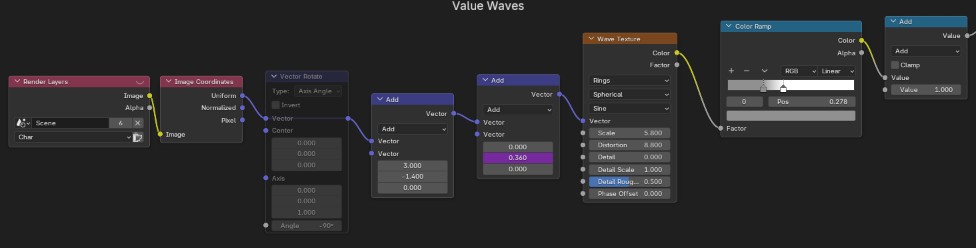
The wave texture is animated like the background, by using the images coordinates :
By using an add node, it is easy to change the color of the gradient :
Final result
Here is the final result :