Maps
9 minutes read
Importing maps is a tedious process, this is why I only used the Iceland map, and not in its entirety. But it’s definitely possible to get a good result in a reasonable time. I will describe the basics of the method with the Fjord map.
Why even bother doing this ? In Attack on Tarkov, I often used screenshots as backgrounds. But this limits the camera movements and how the characters can interact with a scene. The limitations are akin to shooting a video on a green screen. I’m glad I could use the maps in Blender, as some of the shots I made in the video would have been impossible without it.
Before starting, you can enable the following settings in Preferences > Navigation to make navigating around the map easier : 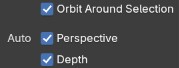
Terrain
Mesh
There are two types of terrain :
- PrefabHierarchyObject > GeneratedMesh_Map_[name]_GM.glb is the map screen you see before spawning.
Mesh > TerrainColliderMesh_Map_[name].glbis the actual terrain you can walk on and see in the background.
After importing, it is useful to go to the 3D viewport, press N and go to the View menu. Increase the Clip end value to be able to see the entire map.
Textures
There is only one texture per map, so the only setup we can use is a diffuse material. The textures are in the Texture2D folder and are named Map_[name]_GeneratedOverlay.png or Map_[name]_Overlay.png. Since we import a mesh without any UV information, a little adjustements are necessary to position the texture properly : 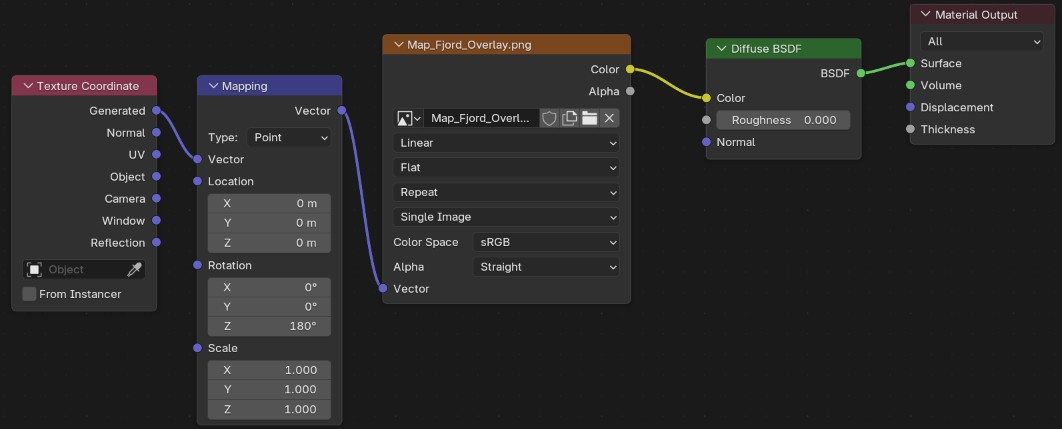 For the Fjord map, I only had to use the Generated texture coordinates and rotate the texture by 180°.
Here is what it looks like when the texture is applied : 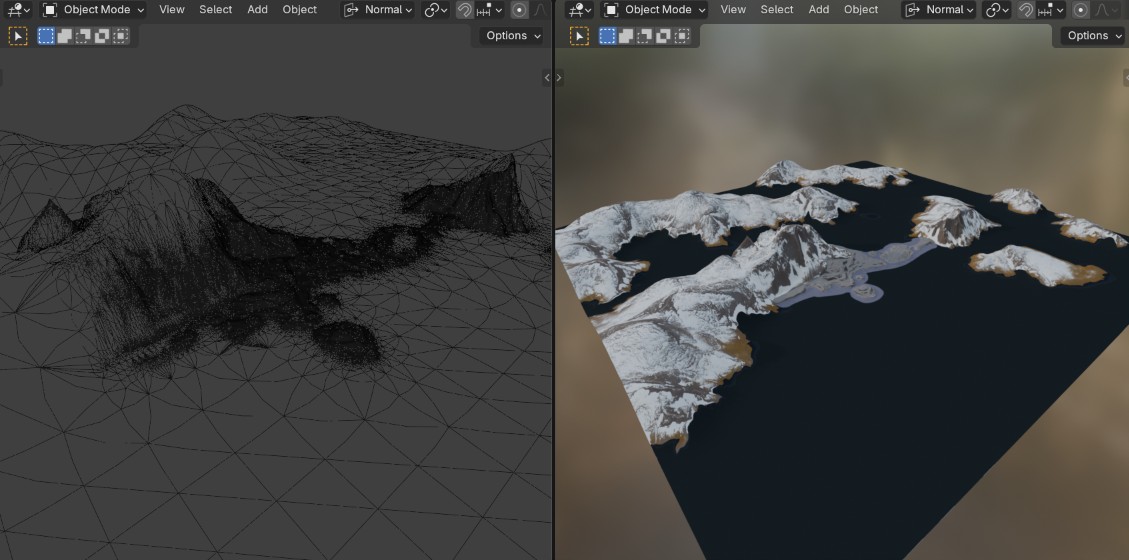
Buildings and landscape
The buildings and other items (rocks and trees) are in SceneHierarchyObject > Map_[name].glb. Before importing it, create a new collection so that we can manipulate it without affecting the rest of the scene.
Warning
This file contains many objects and can take a few seconds to load.
Cleanup
Select the items with Right click on the collection and Select objects. Clear the parenting with Alt + P and select Clear and keep transformation .
Now we can delete the items that are not useful. These can be selected by filtering in the outliner or by searching for their name.
- The empty objects ;
- Objects with “LOD1” in their name ;
- Objects with “LODFar” in their name.
You should now have something that looks like this : 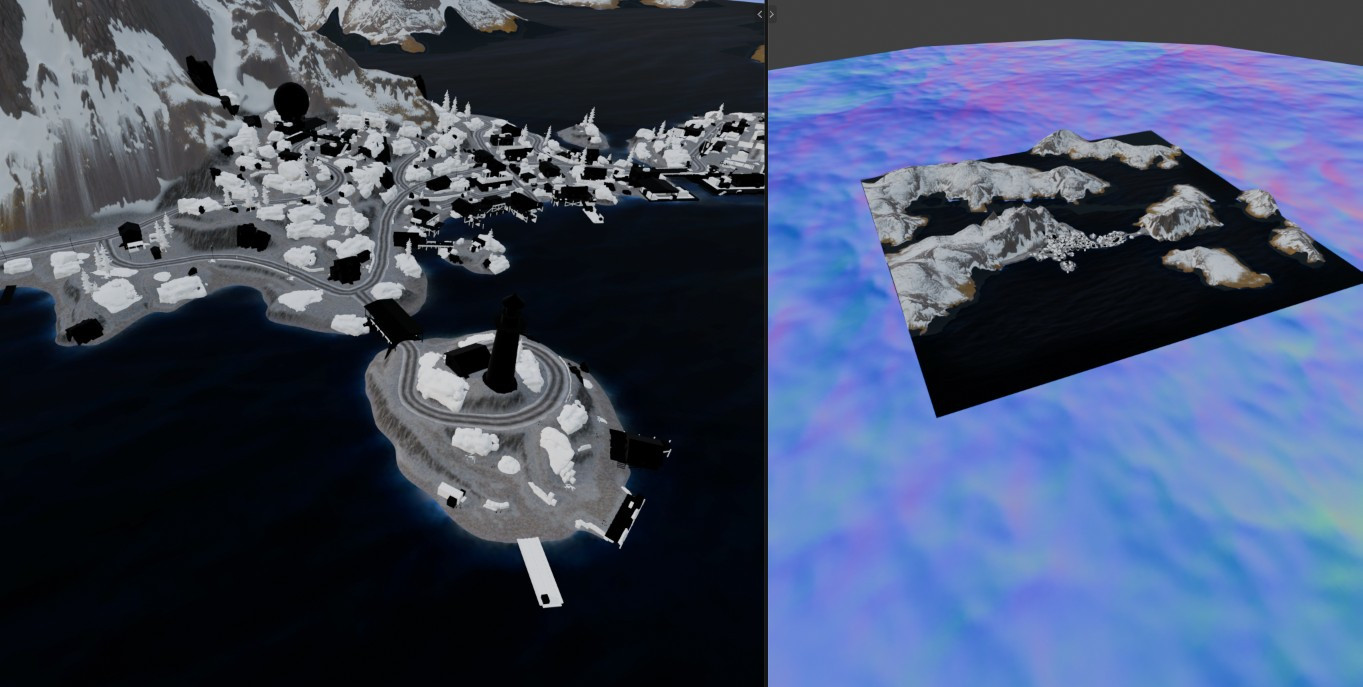
At this stage you can notice two categories of objects :
- Objects with a default white material : those are objects that depend on only one texture
- Objects with a default black material : they depend on multiple textures and will necessitate more work.
Textures
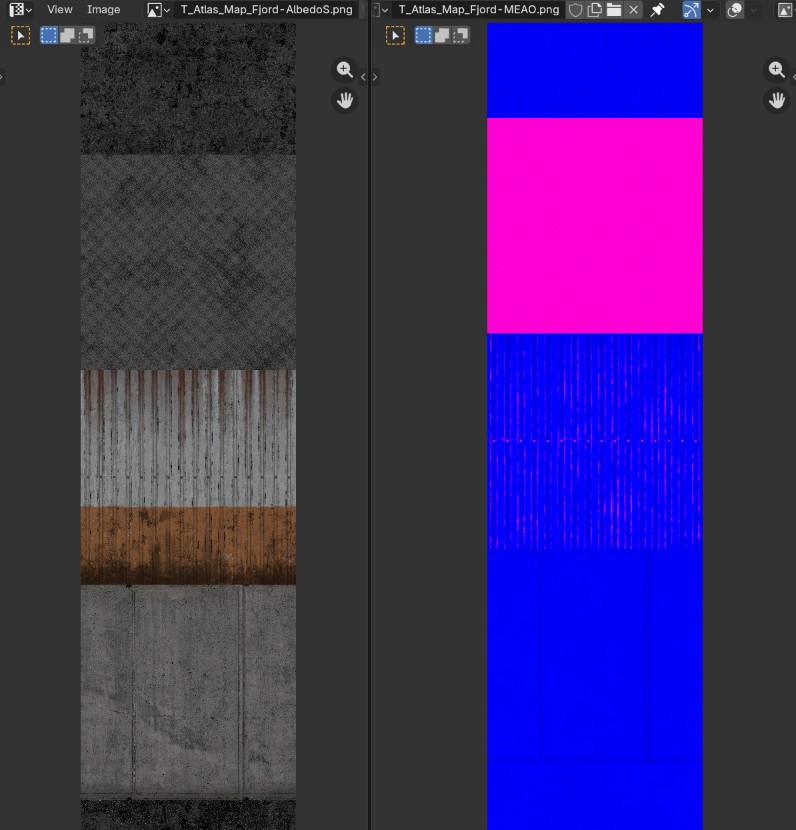
Textures for the maps are stored in the form of a single Texture2DArray under the name T_Atlas_Map_[name]-AlbedoS.png for the Albedo/Shinyness and T_Atlas_Map_[name]-MEAO.png for the Metallic/Ambient Occlusion. The textures are stacked on top of each other, which leads to ridiculous file sizes (for Fjord : 887 MB, 2048 x 182272 px). It can be difficult to manipulate those images in image programs, but the Blender image editor works well.
Objects with a single material
For these objects we will create two materials :
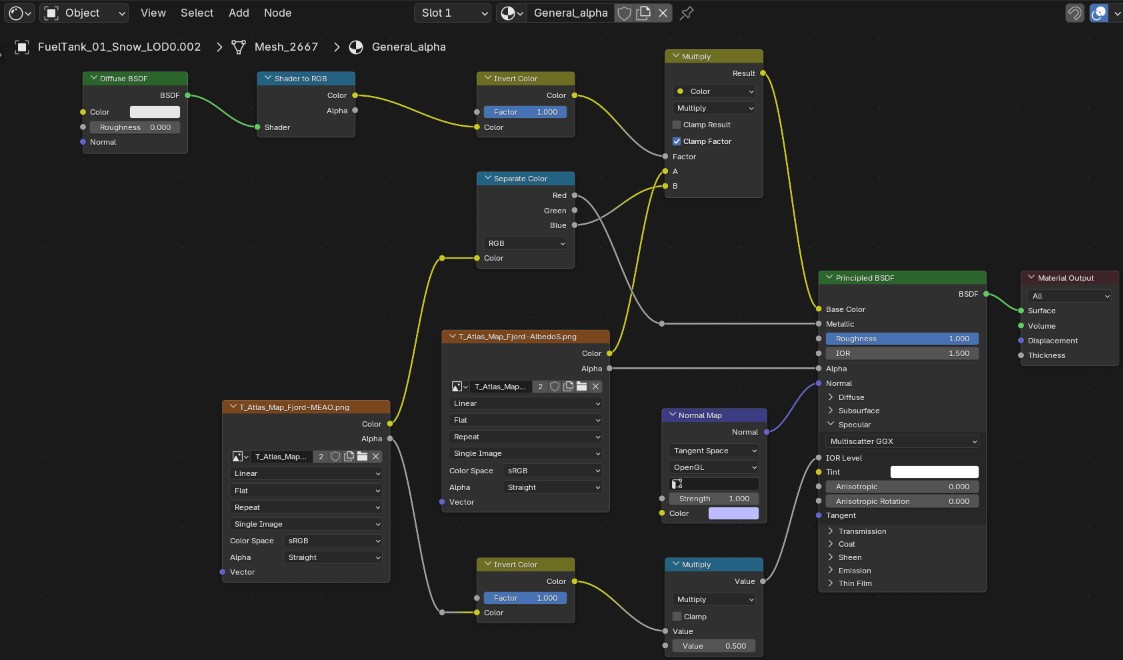
- A “general” material which will work the same way as the default material setup, except there will be no normal map.
- A “transparent” material (for trees and such) which will be similar to the “general”, except the alpha channel of the AS texture will be used for transparency instead of roughness :
Then we will use the UV editor to assign the correct texture to the materials :
- Calulate the number of stacked textures based on the image dimensions : for Fjord, it is 182272/2048 = 89.
- Enter the UV Editor.
- Select the object you want to apply the texture to.
- The UV are stretched because Blender expects a square texture. To fix this, scale the texture by the factor we calculated previously. In this case, press S to scale, Y to only affect the vertical axis, then enter
1/89and press Enter.
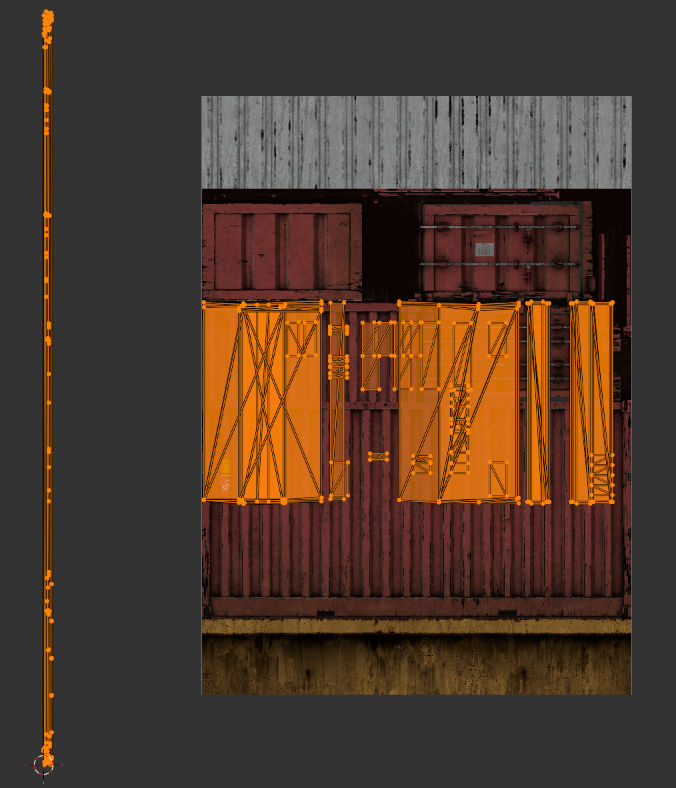
- Use G and Y to vertically move the UVs and find the appropriate texture for the object you selected. In this case it is better to disable overlays in the 3D viewport to have a better view of the object.
- For some objects like the wood fence in this example, the texture is smaller, so you’ll also have to scale it by a factor of 0.5 on both axes, and move it on the X axis.
- Once the texture is setup properly, select every identical object, while making sure the textured object is the active selection. Press Ctrl + L and choose
Link Object Data. This will make the identical objects use the same UVs.
Caution
- Make sure the textured object is the active object, as this object will transfer its properties to others.
- When selecting the other objects, you can use the outliner “search” function. Make sure to use the full object name : wood_fence_02_LOD0 and wood_fence_02a_LOD0 are two different objects ! If you only search for “wood_fence_02” you might end up replacing the “02a” objects by the “02” models.
Here is another example with a tree (with transparency) : Notice that in this case I had to rescale the UV another time to make it match the texture.
This process is a bit tedious but is fast once the get used to it. Since you have to manually slide and scale the UVs, I don’t think it can be automated.
Objects with multiple materials
This case is more complex and will require more work. The basics are the same : we have to find the texture that match the object. Except in this case, we must apply several textures to each object. Having reference pictures will help (especially to differentiate the numerous types of concrete or rusted metal).
The previous case was simple because we only needed one material. But sometimes the UVs will be bigger than the square textures. On the X-axis this does not cause any issues, but on the Y-axis the textures are stacked, so the material will apply textures we don’t actually want.
The solution to this problem is to cut out the big texture into smaller ones, and then create a different material for each texture. Then, we will use Edit mode to select parts of the mesh and assign the correct texture to it. The previous method for single-texture objects can still be used to identify which texture we must use.
Let’s apply this method to the lighthouse of the Fjord map. The in-game files generously provides us with a reference picture used for the loading screen : 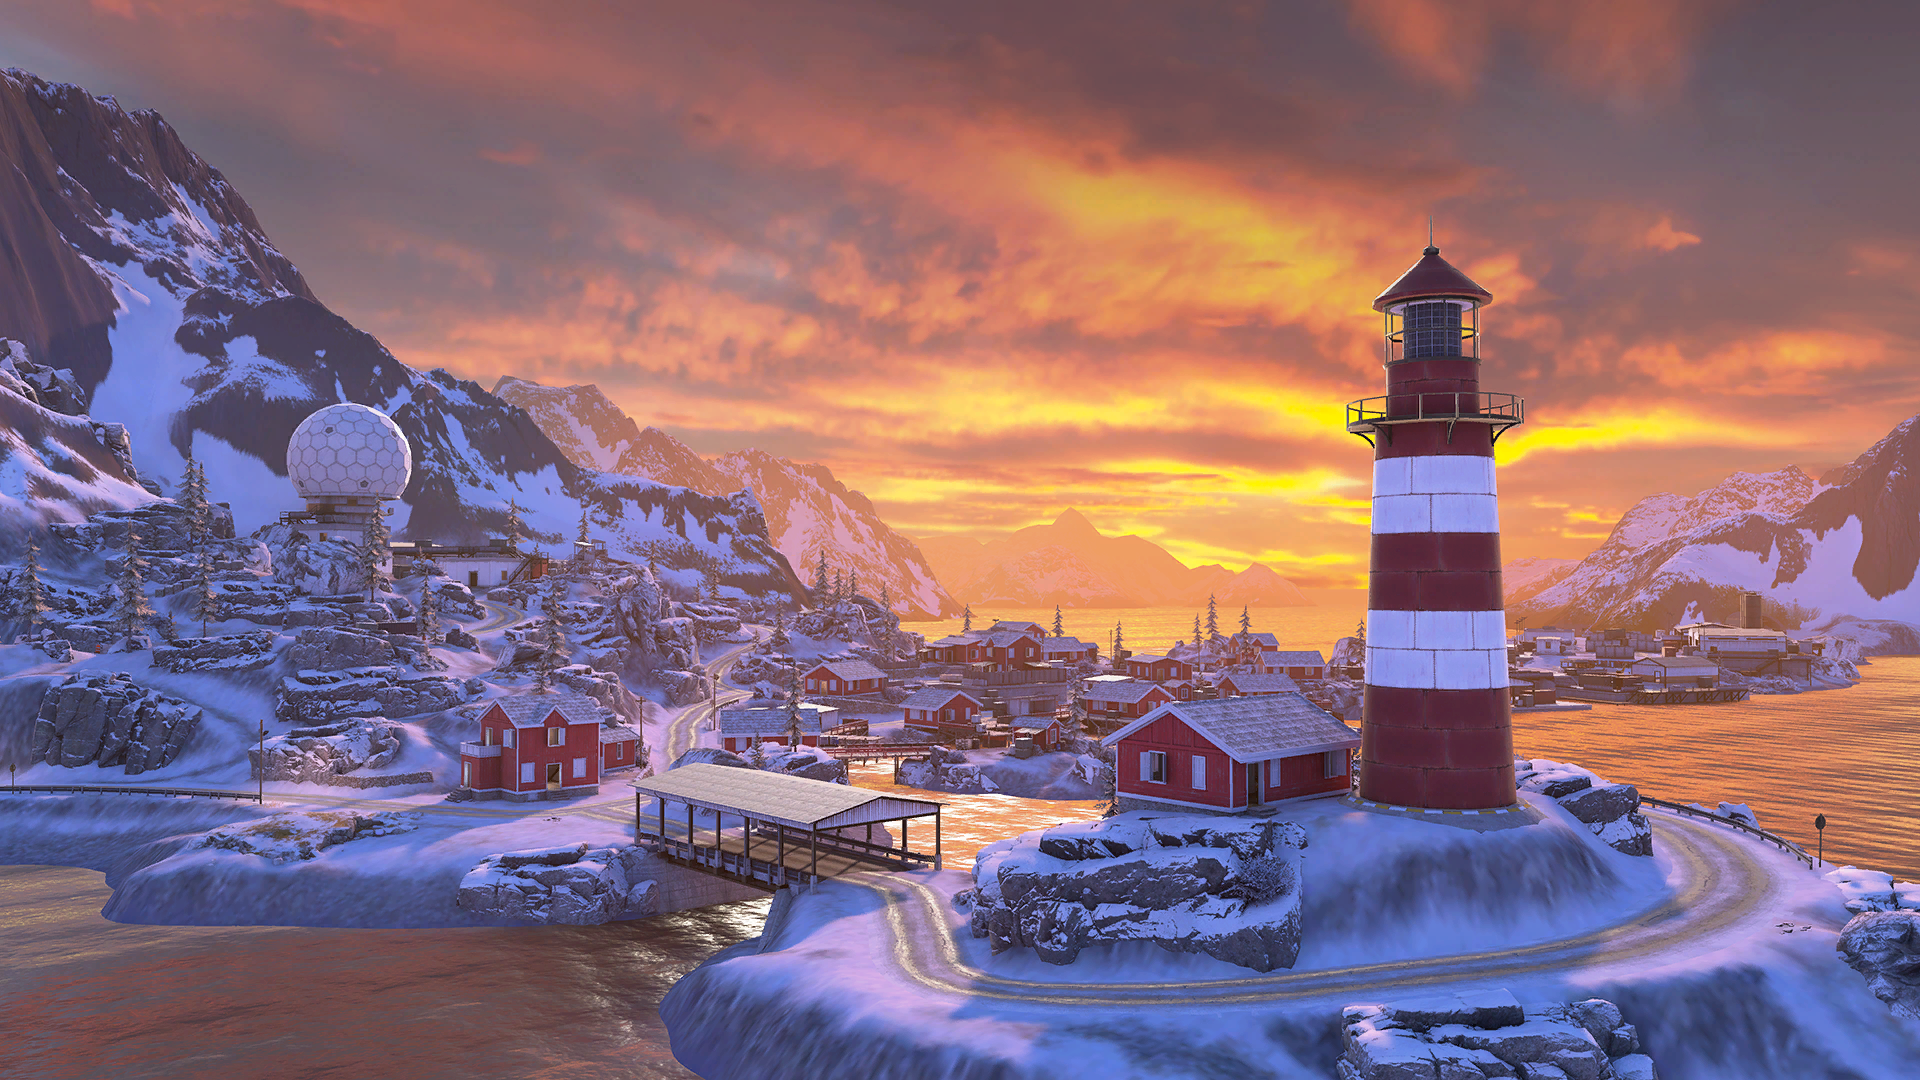
And here are a few relevant textures I extracted from the T_Atlas_Map_Fjord-AlbedoS.png file. If you’re interested in porting an entire map, you could use the Python script I wrote to separate the animated sprites into several images, in order to extract all of the textures as separate files. 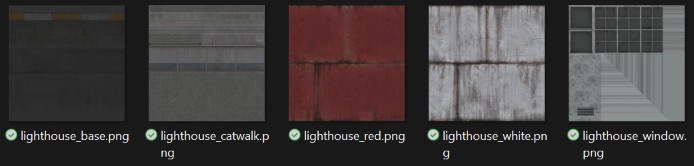
When working on a single object it is easier by using View > Local view to isolate it. If we apply one of these textures to the mesh, we obtain the following result : 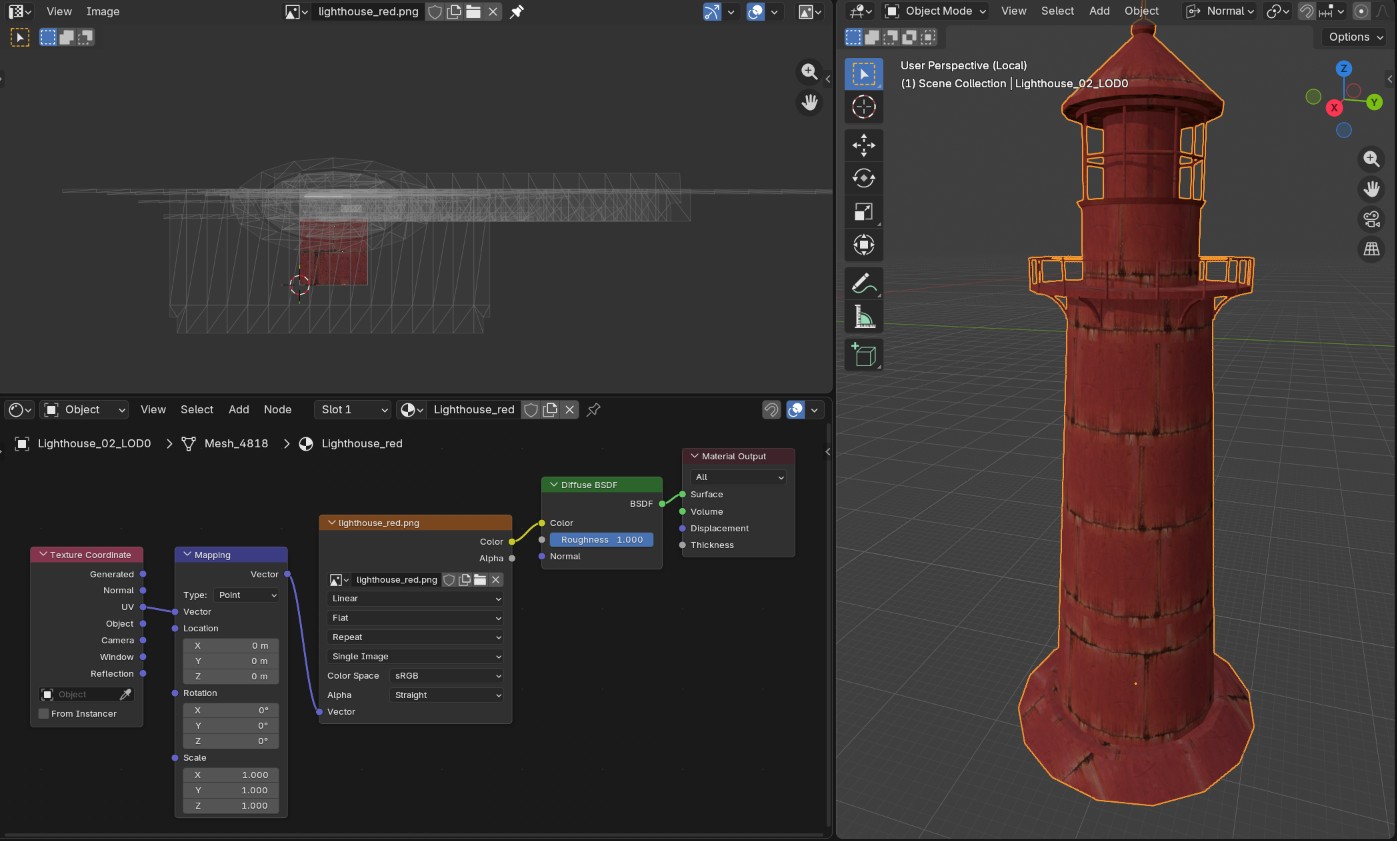 As you can see, if the UVs are scaled properly (they might not be if you scaled them previously), they seem to wrap around the mesh nicely. Now it’s just a matter of selecting different parts of the mesh and moving their UVs so that the match the reference.
Here is the result after a few minutes of work : 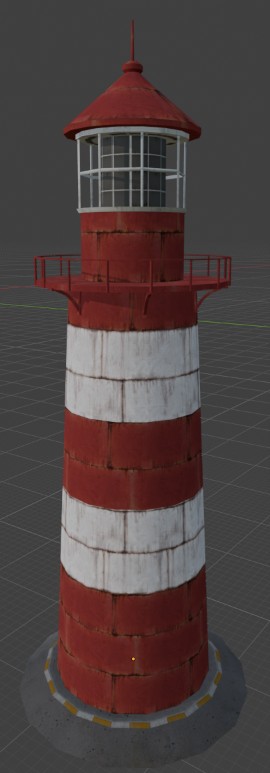 It’s not perfect, I didn’t do the catwalk, and I was lacking reference pictures, but if it’s simply an element in the background, it can stay like that.
Of course doing this process for every other object is tedious. I don’t know if there is a simpler way to do this. For my video, I decided to keep the action near the ORE spawn so I only really textured half of the objects.
Water
The huge blue square is a normal map for the water areas. There are no other associated textures, so I used this setup : 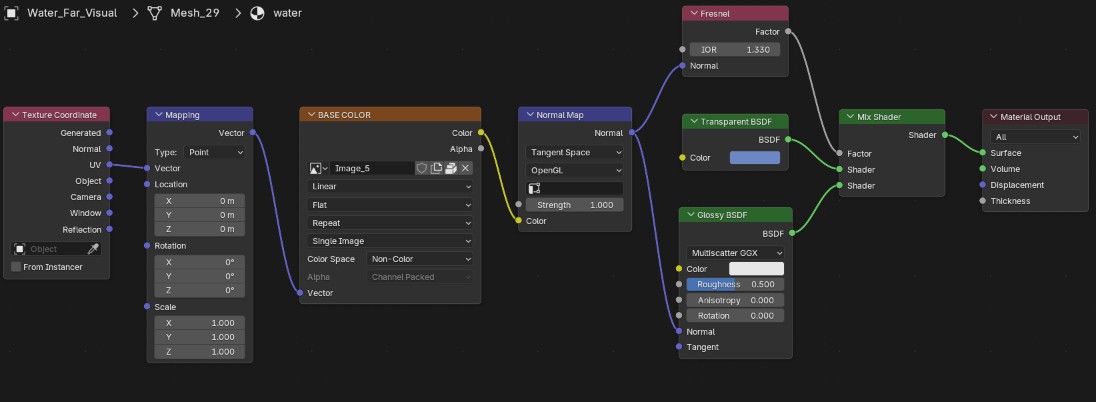 The mapping node can be animated to make the waves move.