Characters
4 minutes read
Characters can be found in the mesh folder under the name of their class (Assault.glb and ORE_Assault.glb for the opposing factions). They only need a single material for each character.
Preparing the mesh
The mesh is actually made of disjoint parts :
- some are separate objects (the pouches on the vest),
- others are a consequence of UV unwrapping : the seams are present in the mesh, so you can find duplicate vertices in some places.
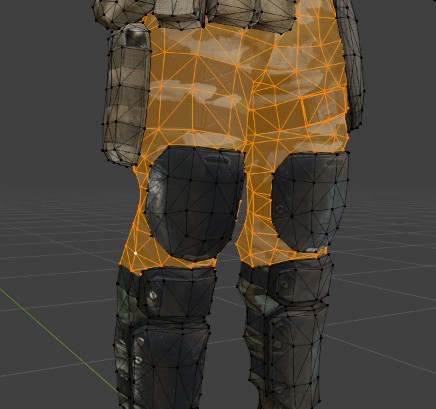
This can mess up the automatic weights system. So easiest way around it is to go to Edit mode, press A to select everything, then press M and then Merge > By distance. However, this can generate artifacts which are especially visible on reflectives surfaces.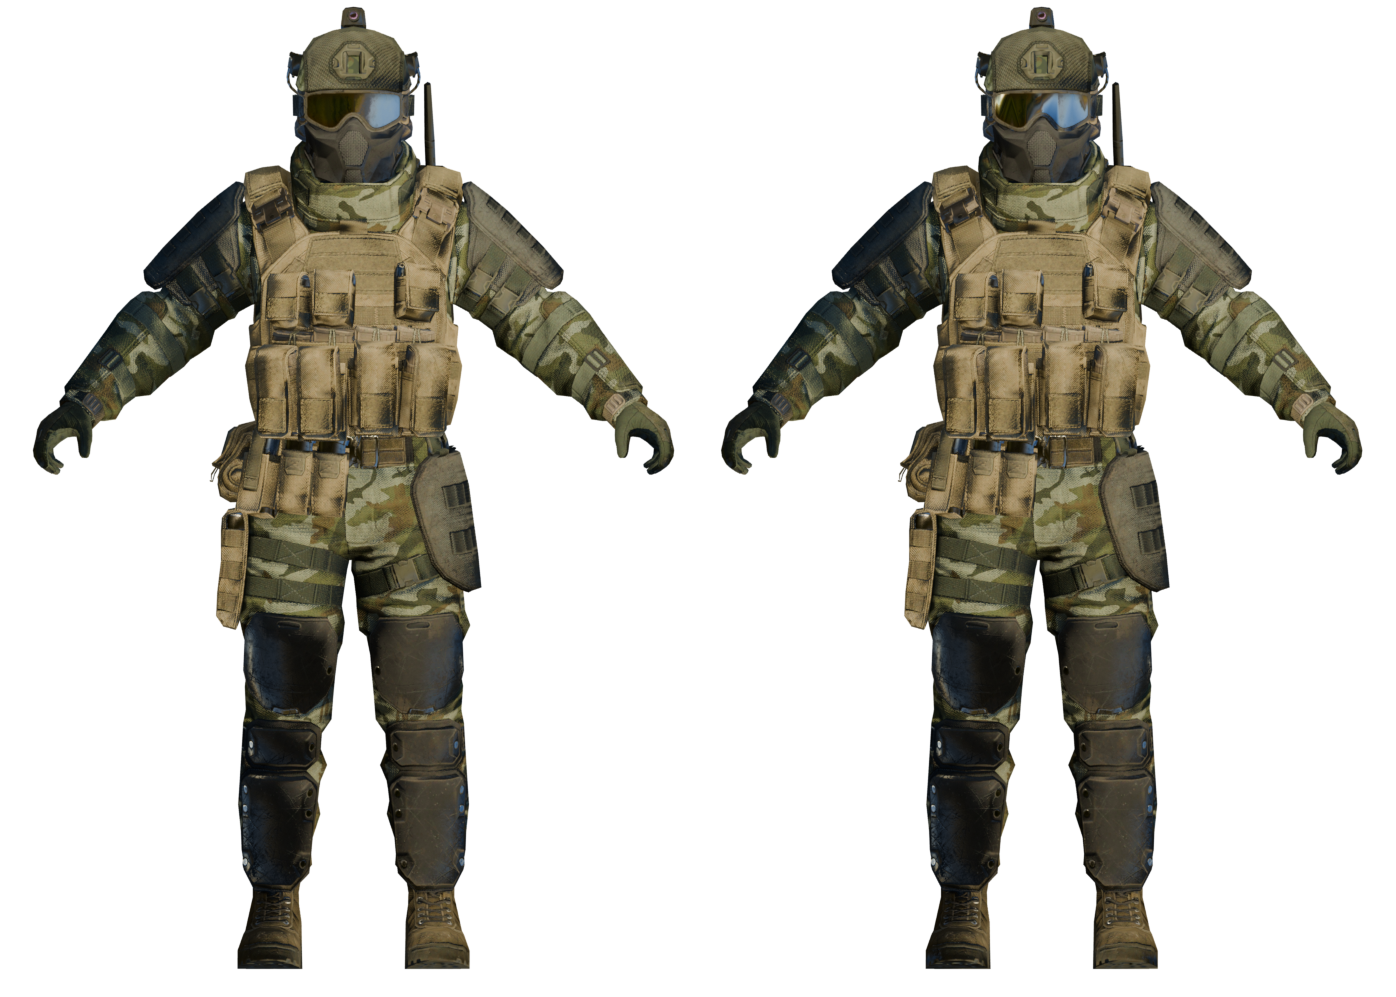
In this case this was pretty minor so I decided to ignore it, but it should be possible to export the rig and weights from the game, which would make this process unnecessary.
Rigging
To make the rig I used the built-in rigify add-on. I’ll go over the process and the problems I faced, but it would be easier to watch a dedicated video tutorial if you’re interested.
Creating the skeleton
In Object mode, add an Armature > Rigify Meta-rigs > Human. Go to Object > Viewport display > In front to keep it visible at all times.
In Edit mode :
- Delete the bones for the face, as the Forefront characters don’t need them.
- Scale the armature so that its size corresponds to the character, it should go from the feet to the top of the head.
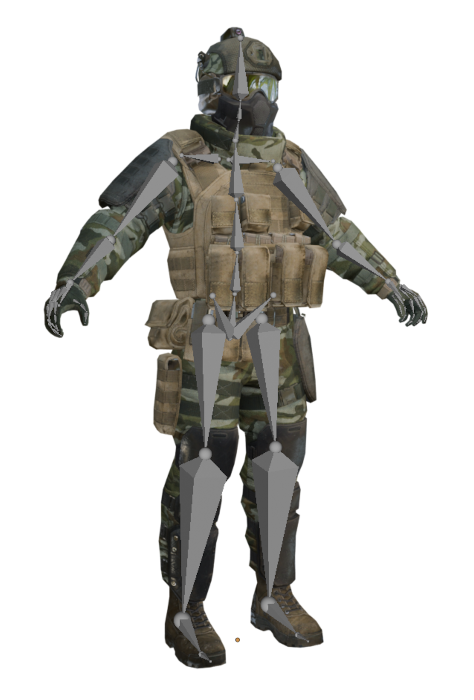
- Place the bones to make them correspond to the character’s joints. To do this, use the
Active elementpivot point and theVolume snappingtool. You should know have something like this, with a skeleton adapted to your character :
Rigging with automatic weights
In Object mode, select the armature and go to Data > Rigify > Generate rig. This will create a new armature. Select the mesh, then the armature, and press Ctrl+P, choose Armature deform > With automatic weights.
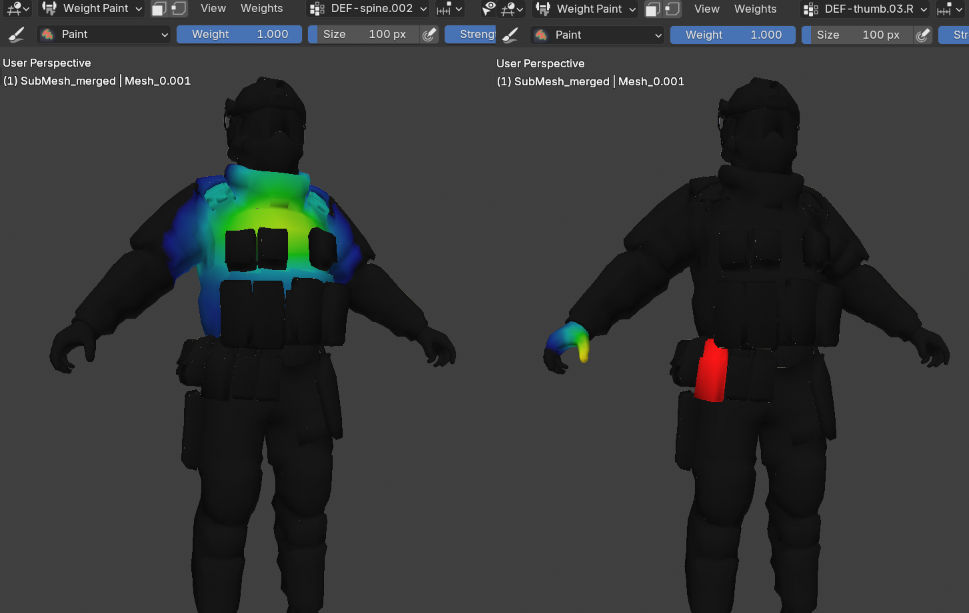
You can now go to Pose mode to check “if” there are any issues. Unfortunately, there will be a lot of issues.
In this example some of the pouches don’t follow the torso, and some of them even follow the hand ! Here’s what it looks like in terms of weights :
Cleanup
This is where the “fun” begins. Now we have to manually correct the weight painting for every bone. I’m not going over the entire process, but here a few tips :
- Keep in mind the original bone structure.
- Use Edit mode and L to select connected vertices and use it as a mask for the weight painting (useful for pouches and other stuff).
- The gradient tool is very useful, especially paired with masking (for exemple to weight paint the head entirely in one operation)
- Be careful about thin objects that may have two sides (straps and clothing), sometimes the weight paint only affects one side and it creates weird artifacts.
- Lock the weight paint for a zone once you’re sure it’s correct.
- Don’t give up !