Material setup
6 minutes read
Strategies
The materials used in Unity are made of several textures. The exact material setup will depend on the game, and sometimes there can be several types of material for a single game, this is the case for EFT. The best ways to do this are :
- Reading the game engine documentation ;
- Taking “enlightened guesses” : does it look good ? Is it coherent with the object I’m looking at ?;
- Randomly trying stuff ;
- Re-use the work of someone who knows what they are doing.
As a reference, you can watch Open3DLab’s video about this topic.
I will present below the setup I used for the objects I extracted from Forefront, which uses the same material setup for all of its objects.
Texture types
Forefront uses three types of textures, whose type is indicated at the end of the file name. Each texture has four channels. In “regular” images, these channels correspond to the red, green and blue colors, and to the alpha channel used to encode transparency. In game engines, these can contain other kinds of information that I will detail below.
AS
The [texture name]_AS.png files contain two different informations :
RGB channels : Albedo
The RGB channels contain the Albedo parameter, which in Blender corresponds to the Base color of the material. 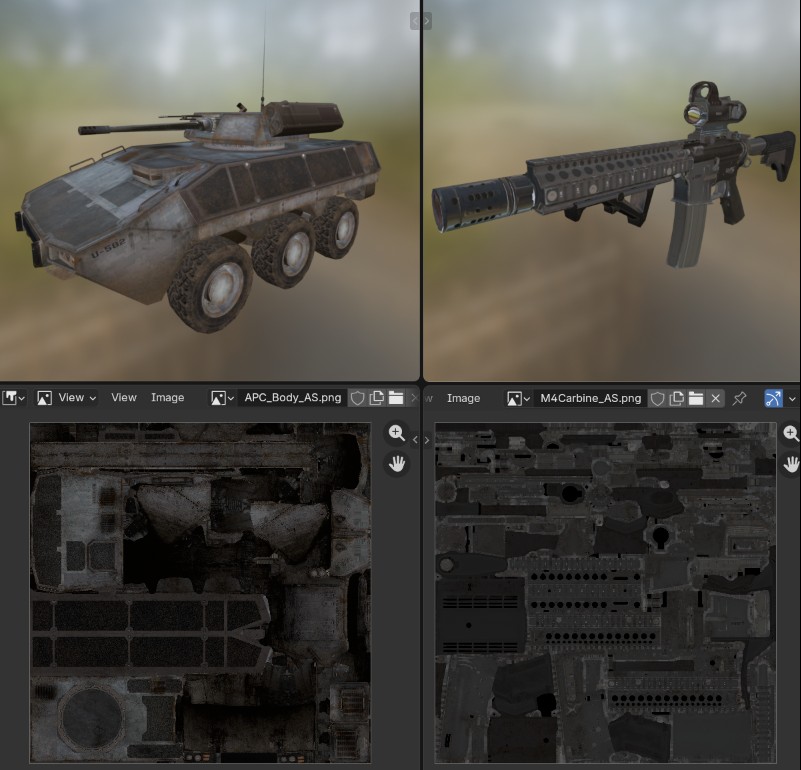
Alpha channel : Smoothness
The alpha channel contains the Smoothness of the material, which is the inverse of the Roughness parameter in Blender. 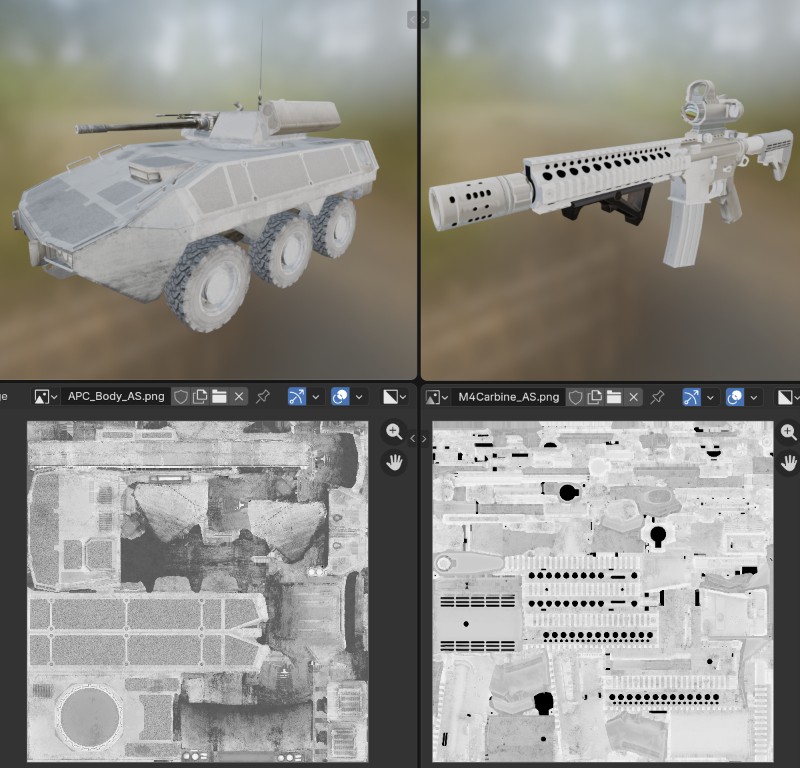
M
The [texture name]_M.png files contain three different informations, including the metalness. Visualizing this texture gives the following result : 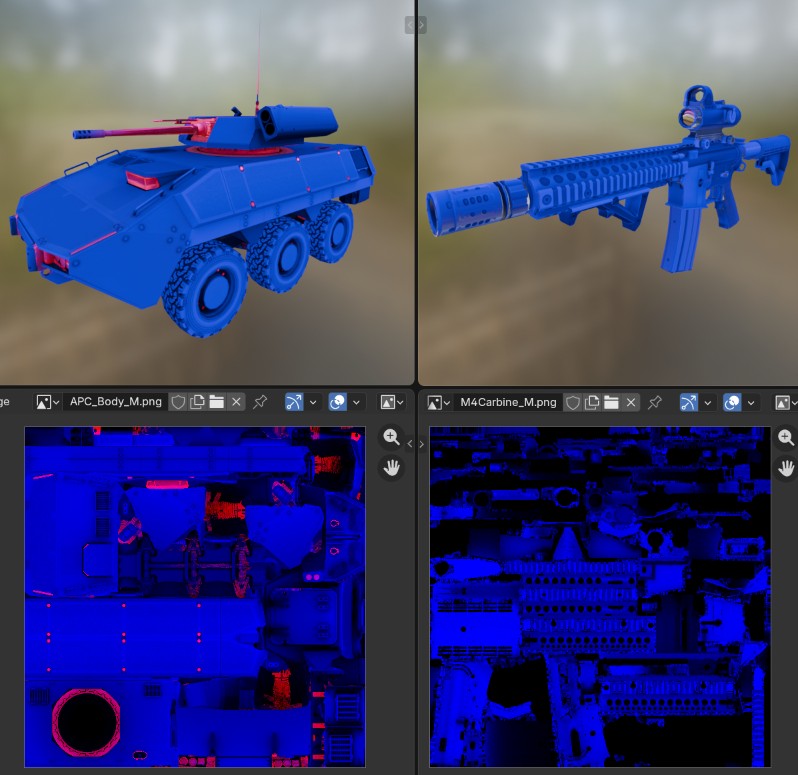 This result shows that this texture does not contain any actual color information, so we have to separate the information contained in each channel. This can be done in Blender using the
 Separate color node.
Red channel : Metalness
If you look at the red channel exclusively, you will notice that it is a binary texture (only black or white values). From this and its position on the meshes, we can deduce that it correspond to the Metallic factor. 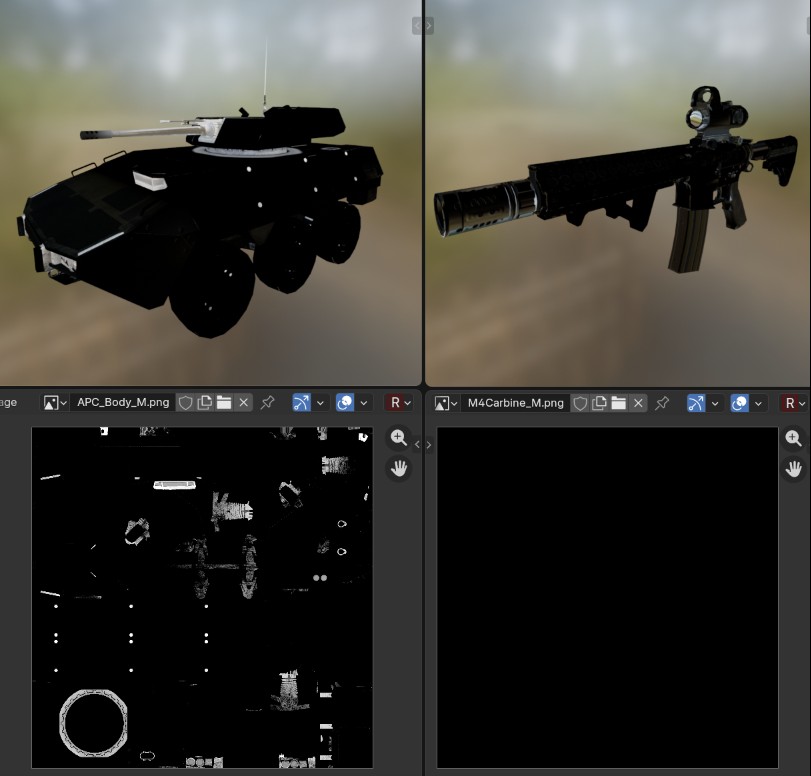 Notice that it does not exactly correspond to objects we could think are “metallic”. It is more of a way (other than the “smoothness”) to represent shiny materials.
Green channel : empty
The green channel does not contain any information.
Blue channel : Ambient Occlusion
The blue channel encodes the ambient occlusion, which is a way to emphasize the shadows occuring in locations where the light gets trapped (typically near sharp corners and edges). This gives a texture that seems to draw the edges of the objects. 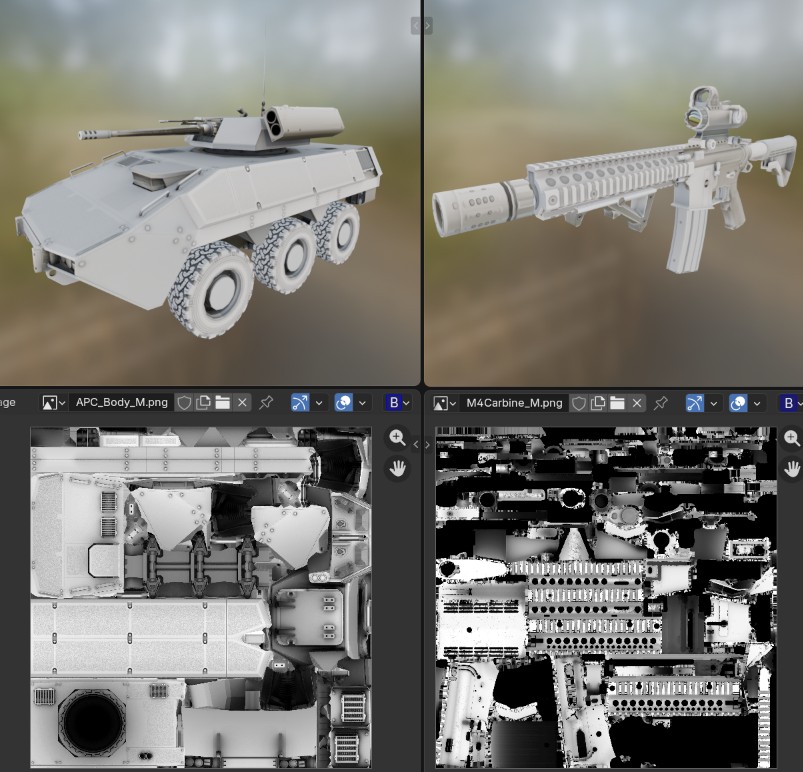
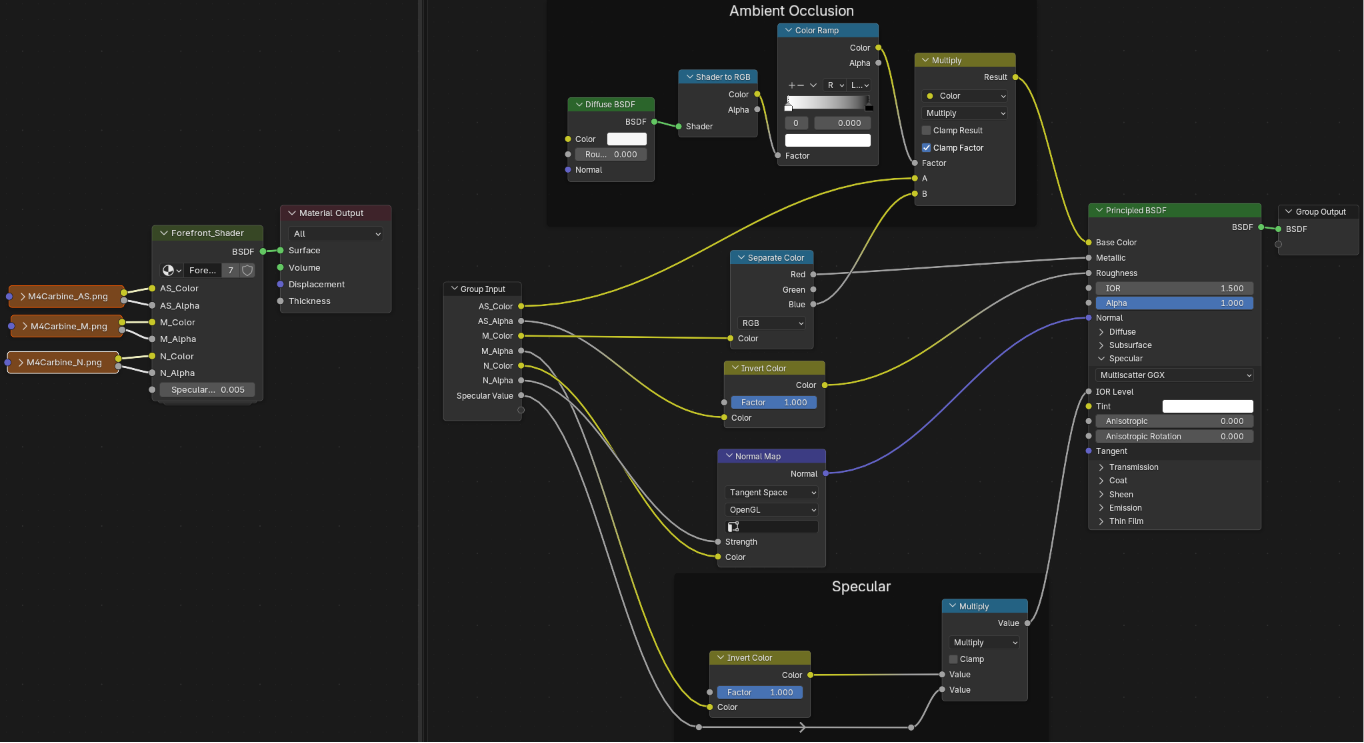
To use this texture in Blender, the quick and lazy way is to multiply it on top of the base color. The correct way is to use a Shader to RGB node as a factor to only apply it to dark areas (refer to Novan Byworks’ tutorial). In Cycles this will not work, but it is not needed anyway thanks to the path tracing render system.
Alpha channel : Specular ?
I’m not sure what this channel is for. 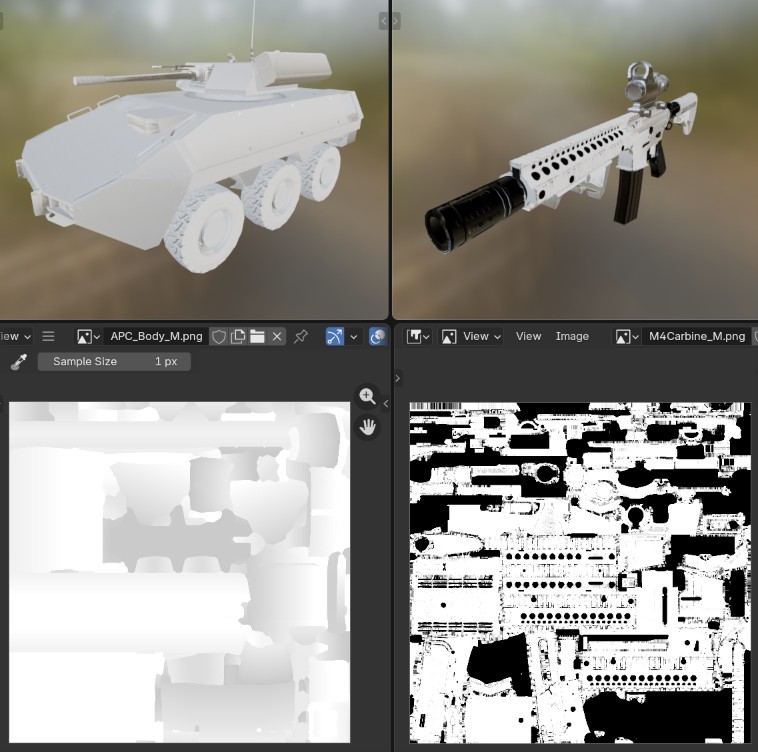 As you can see, it is different for the vehicle and for the weapon. I inverted it, multiplied it by 0.005 and plugged it into the
 Specular IOR slot to create a slight shiny effect.
N
The [texture name]_N.png contains the normal maps, which encodes light reflection and is useful to add small details without needing extra geometry.
The color channels are the normal map itself : 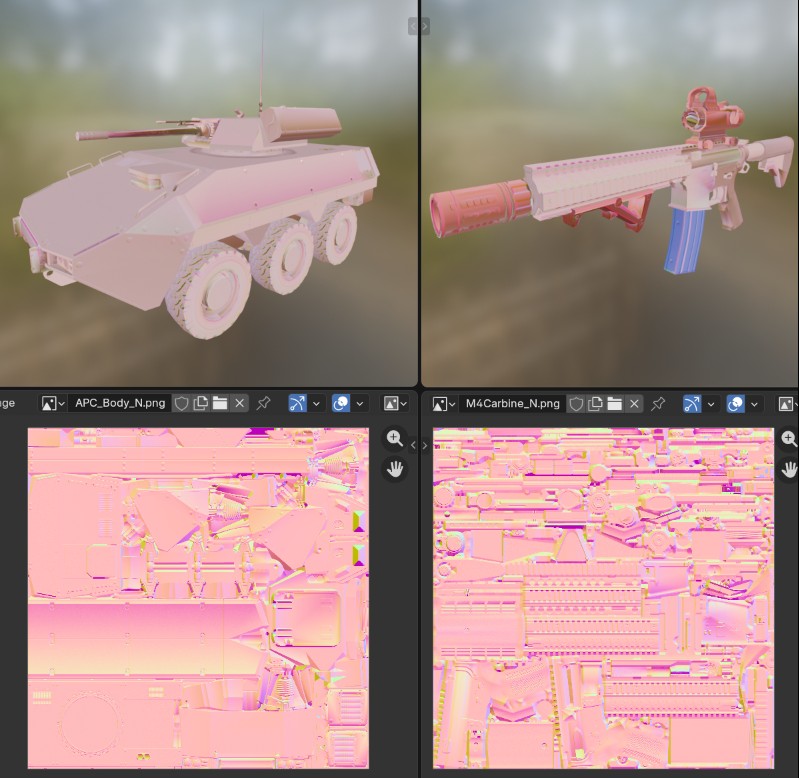
and the alpha channel is the color map strength : 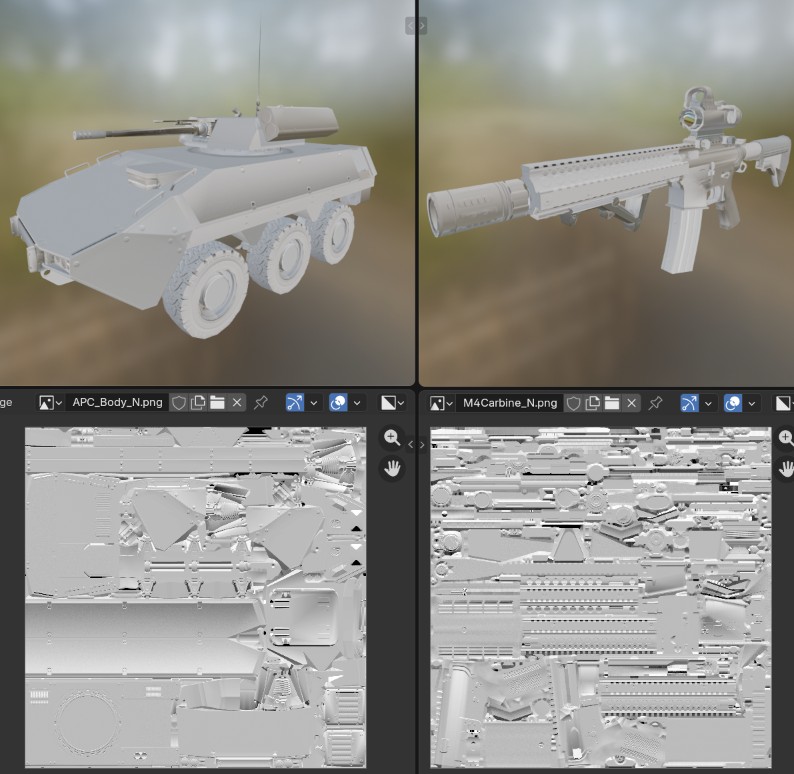
These can be directly used with the Blender Normal map node.
There are two types of normal map conventions. Unity uses the OpenGL format. If you don’t know which convention to use, holes will appear as bumps and vice-versa.
MAJOR UPDATE : It seems that half of my material setups were… wrong. I made my video while ignoring some artifacts I didn’t know how to fix. I ended up getting help on a blenderartists post, where Kanerka gave me the answer.
There are actually two types of normal maps in Forefront, which depends on how the Unity game engine optimizes them. 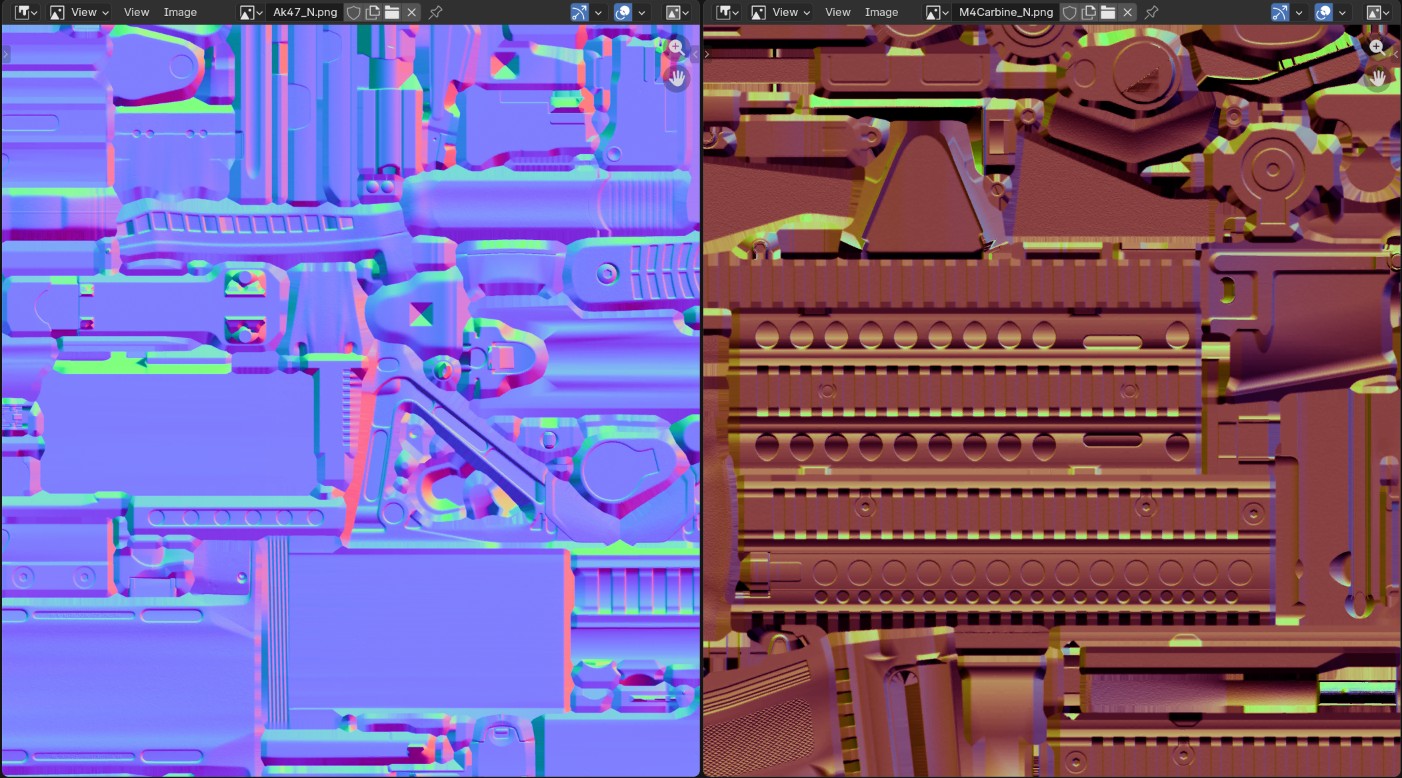
- Blue normal maps are normal maps that are interpreted correctly by Blender.
- Red normal maps need to have their red and blue channel swapped.
Here’s the trap : you cannot predict which objects have a blue or red normal map. In the example above, these are the textures of the AK and M4 rifles. Despite belonging to the same class of objects, they have a different type of normal map. The only way to be sure is to look at the texture itself and to edit the material accordingly. Here is an example of material with a red normal map and the nodes used to swap the R and B channels :
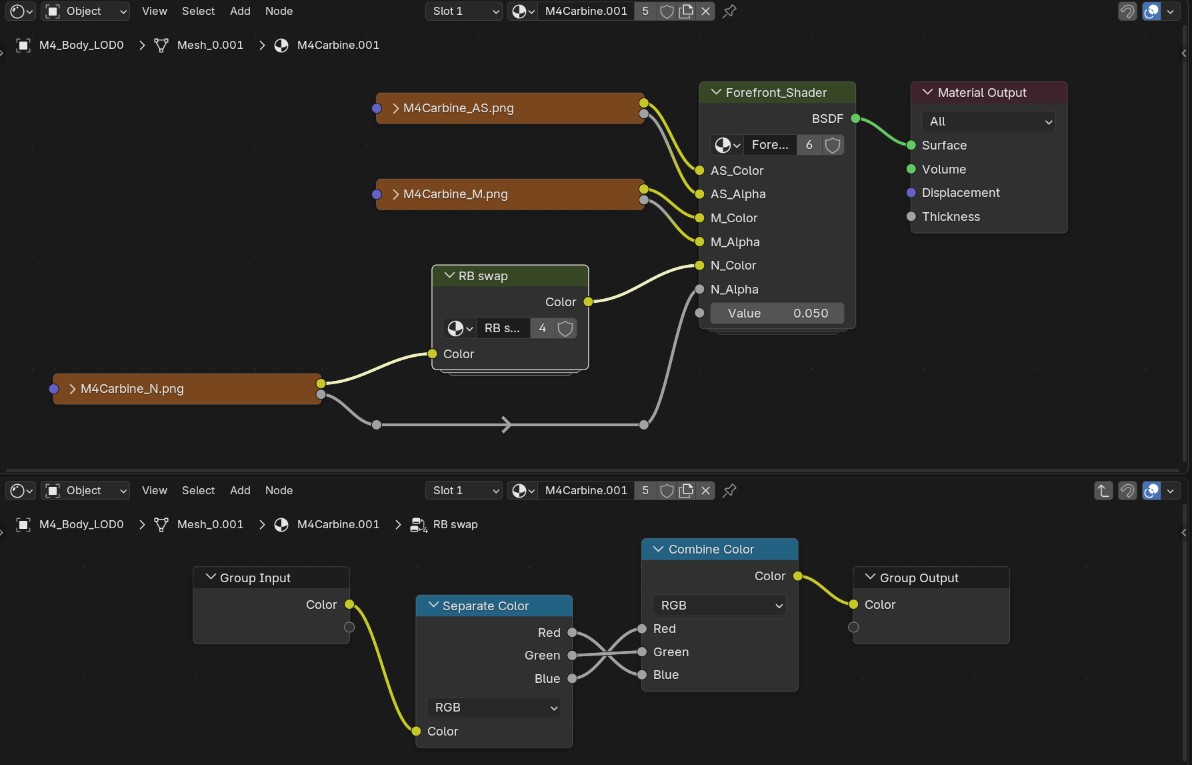
Complete material setup
I created a group containing every necessary node to make it easy to reuse the material setup. The fastest way to apply the textures is to select them in the file explorer and drag them in the shader editor, press H to reduce their size and then S to scale them and make the nodes closer, before connecting them to the shader group.
Caution
Make sure the “N” image is set to
Color space > Non-color, otherwise it could create some artifacts.